Is your camper roof showing signs of wear and tear? Or maybe you’re just being proactive about maintenance? Either way, finding the right camper roof coating can save you thousands in potential repair costs while extending the lifespan of your beloved recreational vehicle. As someone who has restored multiple RV roofs and helped countless fellow campers protect their investments, I’m here to share everything you need to know about camper roof coating options, application techniques, and the best products currently available.
Camper roof coating is essential for maintaining the integrity of your RV’s roof, preventing leaks, and protecting against UV damage. With the right coating solution, you can add years to your camper’s life while avoiding costly repairs down the road. Let’s dive into the world of protective roof coatings and find the perfect solution for your specific needs.
In This Article
Understanding Camper Roof Coating: What You Need to Know
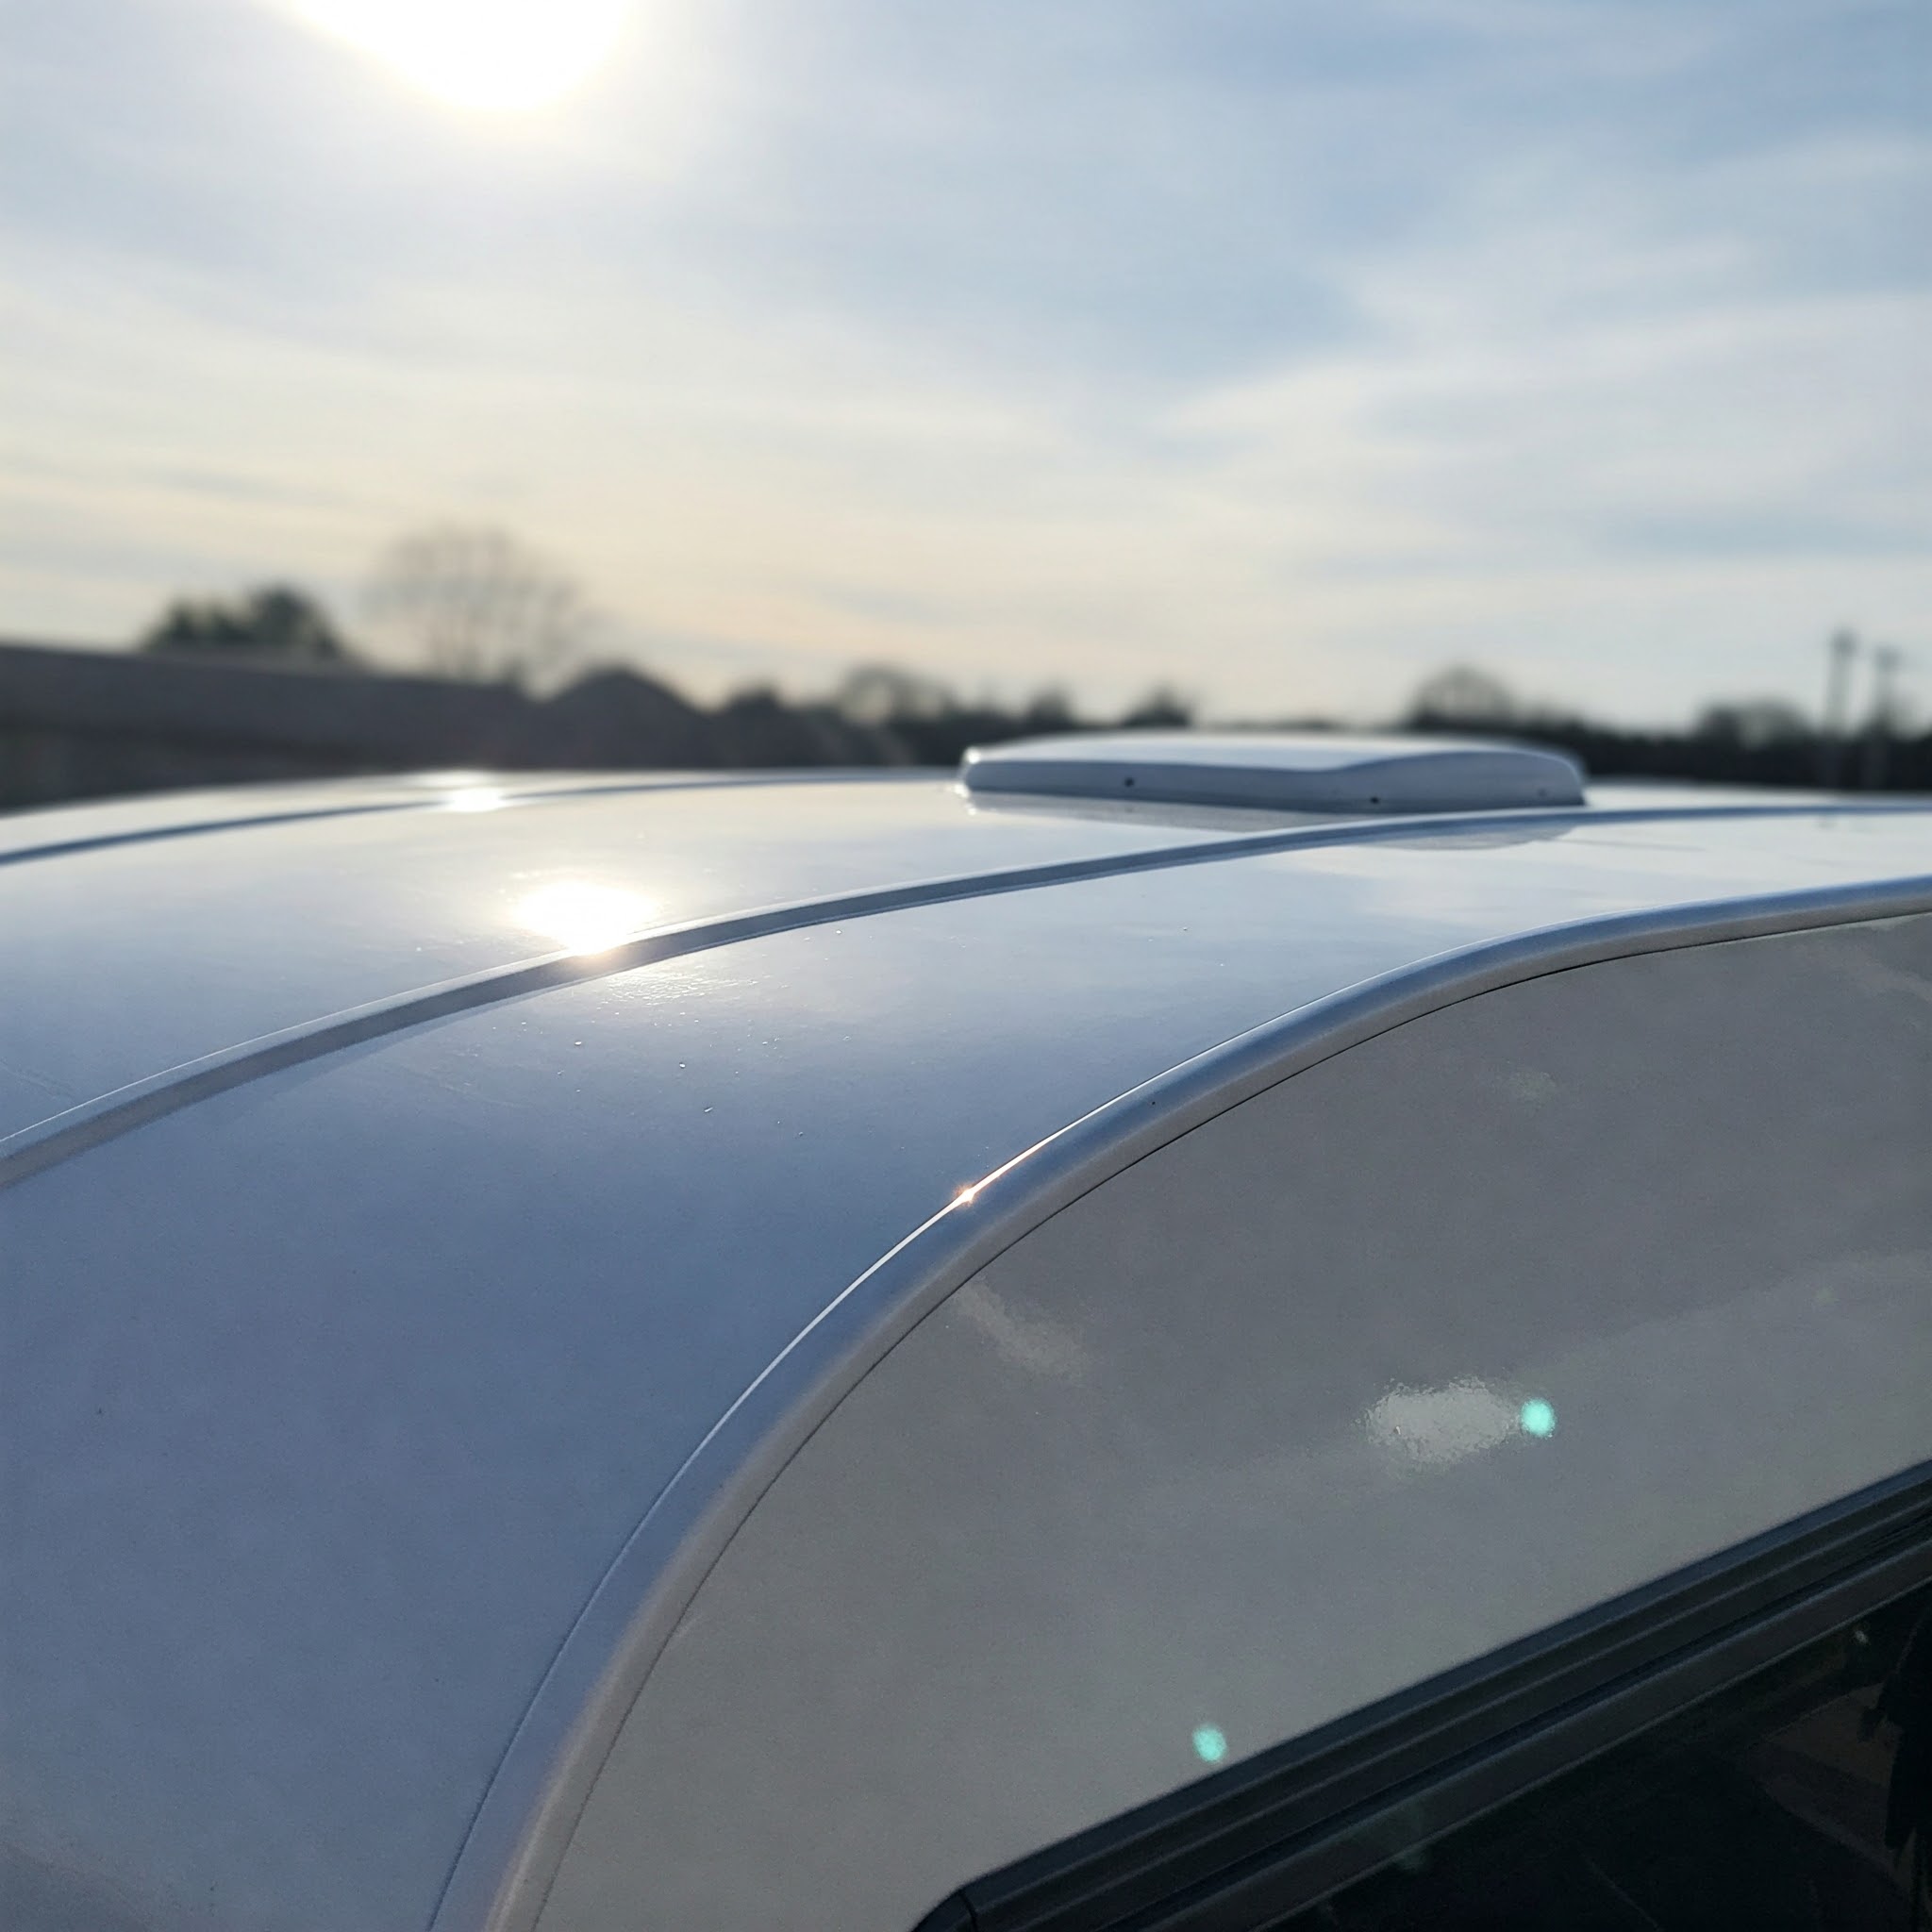
Before we explore specific products and application methods, it’s important to understand why camper roof coating matters so much. Your RV’s roof is constantly exposed to harsh elements – scorching sun, heavy rain, hail, snow, and branches scraping overhead. Over time, these factors can degrade even the most durable roof materials.
A quality camper roof coating creates a protective barrier that:
- ✅ Seals existing minor leaks and prevents new ones
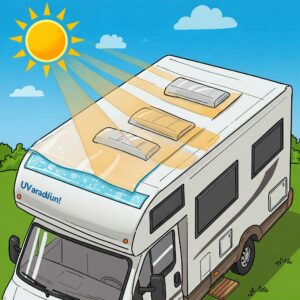
- ✅ Reflects UV rays, reducing heat buildup inside your camper
- ✅ Extends the lifespan of your roof materials
- ✅ Improves energy efficiency (less need for air conditioning)
- ✅ Adds an attractive finish to your RV
Many camper owners don’t realize that roof maintenance isn’t just optional – it’s essential for preventing catastrophic damage. A small leak today can lead to rotted wood, mold growth, and damaged interiors tomorrow. Regular application of camper roof coating can be the difference between a minor maintenance expense and a major renovation project.
️ Types of Camper Roof Materials and Compatible Coatings
Before selecting a camper roof coating, you need to identify what material your RV roof is made from. Different roof types require specific coating products for optimal performance and adhesion.
EPDM Rubber Roofs
EPDM (Ethylene Propylene Diene Monomer) rubber is one of the most common camper roof materials. These black or white membrane roofs are durable but can dry out, crack, and chalk over time.
For EPDM roofs, look for:
- Rubber-specific coatings
- Products containing acrylic or latex
- UV-protective formulations
One excellent option for EPDM roofs is Dicor RPCRC1 Rubber Roof Acrylic Coating, which bonds exceptionally well to rubber surfaces while providing superior UV protection.
TPO and PVC Roofs
TPO (Thermoplastic Olefin) and PVC roofs are becoming increasingly popular in newer RVs and campers. These white or light-colored single-ply membranes offer excellent durability and heat reflection.
For TPO/PVC roofs, consider:
- Silicone-based coatings
- Products specifically labeled as TPO-compatible
- Self-leveling formulations
The Liquid Rubber RV Roof Coating works exceptionally well on TPO surfaces, creating a waterproof membrane that flexes with your roof’s natural movement.
Fiberglass and Aluminum Roofs
Some higher-end campers feature fiberglass or aluminum roofs, which have different coating requirements.
For these surfaces, seek out:
- Marine-grade coatings
- Metal-specific products for aluminum
- Gel coat restoration products for fiberglass
The KST COATING KST063600-20 Elastomeric Roof Coating performs admirably on both fiberglass and aluminum surfaces.
⚡ Top Benefits of Regular Camper Roof Coating
Investing in quality camper roof coating offers numerous advantages beyond simple leak protection:
Extended Roof Lifespan
A properly coated roof can last up to twice as long as an unprotected one. By creating a barrier against UV rays and moisture, coating prevents the premature breakdown of roofing materials. I’ve personally seen 15-year-old camper roofs in excellent condition thanks to regular coating maintenance.
Temperature Regulation
White or reflective camper roof coating can dramatically reduce interior temperatures by reflecting solar heat away from your RV. This can make a 10-15°F difference on hot summer days, reducing air conditioning costs and improving comfort.
Prevent Costly Water Damage
Even minor roof leaks can cause extensive damage to interior structures, insulation, and electrical systems. Waterproof camper roof coating creates a seamless membrane that prevents moisture intrusion. One fellow RVer told me they saved over $5,000 in potential repair costs by catching and coating a weakened roof section before leaks developed.
Improved Aesthetics
Let’s face it – a chalky, oxidized roof looks terrible. Fresh coating restores your camper’s appearance, increasing both pride of ownership and resale value.
Easy Maintenance
Coated roofs are typically easier to clean and maintain than uncoated surfaces. Many products also contain mildew inhibitors that prevent biological growth.
Best Camper Roof Coating Products for 2025
After testing dozens of products and gathering feedback from the RV community, I’ve compiled this list of the best camper roof coating options currently available:
1. Best Overall: Liquid Rubber RV Roof Coating
This water-based sealant creates a flexible, waterproof membrane that works on virtually all roof types. What makes it stand out is its excellent UV resistance and self-leveling properties.
Pros:
- ✅ Extremely durable (5+ years between recoats)
- ✅ Easy water cleanup
- ✅ Low VOCs and minimal odor
- ✅ Excellent elasticity for seasonal expansion/contraction
Cons:
- ❌ Requires multiple coats for optimal protection
- ❌ Premium price point
2. Best Budget Option: Henry HE587372 Roof Coating
This acrylic-based coating provides excellent value while still delivering reliable protection. It’s particularly well-suited for EPDM rubber roofs.
Pros:
- ✅ Affordable price per square foot
- ✅ Good UV reflection
- ✅ Easy application with roller or sprayer
Cons:
- ❌ May require more frequent reapplication (2-3 years)
- ❌ Less flexible than premium options
3. Best for EPDM Roofs: Dicor RPCRC1 Rubber Roof Acrylic Coating
Specifically formulated for rubber roofs, this coating bonds exceptionally well to EPDM surfaces and provides outstanding protection against UV damage.
Pros:
- ✅ Exceptional adhesion to rubber
- ✅ Prevents chalking and oxidation
- ✅ Can lower interior temperatures by up to 20%
Cons:
- ❌ Not suitable for all roof types
- ❌ Requires specific primer
4. Best Long-Term Solution: Kool Seal KS0063600-20 White Elastomeric Roof Coating
This premium elastomeric coating creates an exceptionally durable membrane that can last 7+ years between applications.
Pros:
- ✅ Superior longevity
- ✅ Extreme weather resistance
- ✅ Exceptional flexibility
- ✅ Works on most roof types
Cons:
- ❌ Higher initial investment
- ❌ Longer cure time
5. Best for TPO Roofs: Proguard F99911 Liquid Roof Coating
This specialized coating is one of the few products truly compatible with TPO membranes, creating an excellent bond and long-lasting protection.
Pros:
- ✅ Specifically formulated for TPO compatibility
- ✅ One-coat application possible
- ✅ Outstanding leak prevention
Cons:
- ❌ Higher cost per square foot
- ❌ Strong initial odor
Product Comparison: Top Camper Roof Coatings
| Product | Best For | Coverage per Gallon | Lifespan | Price Range |
|---|---|---|---|---|
| Liquid Rubber RV Roof Coating | All roof types | 50-60 sq. ft. | 5-7 years | $$$ |
| Henry HE587372 Roof Coating | EPDM, Budget-conscious | 75-90 sq. ft. | 2-3 years | $ |
| Dicor RPCRC1 Acrylic Coating | EPDM only | 125 sq. ft. | 3-5 years | $$ |
| Kool Seal KS0063600-20 | Long-term protection | 50-75 sq. ft. | 7+ years | $$$ |
| Proguard F99911 Liquid Roof | TPO roofs | 40-50 sq. ft. | 5-6 years | $$$ |
Don’t Miss These Exclusive Camper Roof Coating Deals!
Protect your investment with these top-rated camper roof coating products! Click on any highlighted product to check current pricing and availability on Amazon. These specially formulated coatings will shield your RV from the elements and extend your roof’s lifespan for years to come!
Preparing Your Camper Roof for Coating
Proper preparation is absolutely crucial for camper roof coating success. Skipping these steps almost guarantees adhesion problems, premature failure, and wasted money.
Step 1: Thorough Cleaning
Start by removing all debris, leaves, and loose material from your roof. Then:
- ✅ Clean the entire roof with appropriate cleaner (EPDM cleaner for rubber, mild detergent for other surfaces)
- ✅ Use a medium-bristle brush to scrub away dirt and oxidation
- ✅ Rinse thoroughly with clean water
- ✅ Allow to dry completely (24+ hours in good weather)
I recommend using Dicor RP-RC-1GL EPDM Rubber Roof Cleaner for rubber roofs, as it removes oxidation without damaging the membrane.
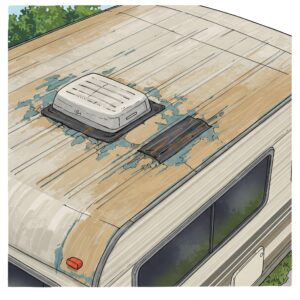
Step 2: Inspect and Repair
With a clean roof, you can now properly assess its condition:
- ✅ Check all seams and edges for separation
- ✅ Look for cracks, tears, or punctures in the membrane
- ✅ Test for soft spots that might indicate water damage below
- ✅ Examine sealant around roof penetrations (vents, AC units, etc.)
Address any issues before coating application. For seams and small repairs, Dicor 501LSW-1 Self-Leveling Lap Sealant works wonders on most camper roofs.
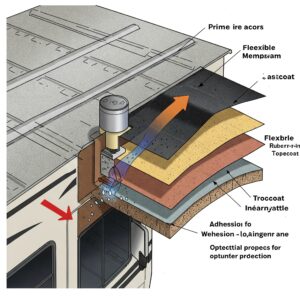
Step 3: Apply Primer (If Required)
Some coating systems require a specific primer for proper adhesion. Check your selected product’s instructions and apply primer if needed.
For EPDM roofs, Dicor RP-CRP-1GL EPDM Rubber Roof Primer creates an excellent base for coating adhesion.
Step 4: Weather Considerations
Plan your camper roof coating project carefully around weather conditions:
- ✅ Temperature should be 50-90°F (10-32°C)
- ✅ Humidity should be below 80%
- ✅ No rain forecast for 24-48 hours
- ✅ Minimal wind to prevent debris contamination
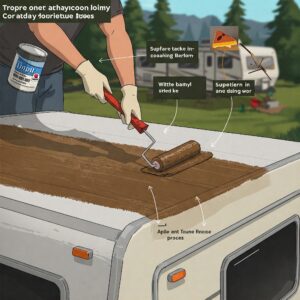
️ How to Apply Camper Roof Coating: Step-by-Step Guide
Once your roof is properly prepared, follow these steps for a successful coating application:
Step 1: Gather Your Tools
You’ll need:
- Medium-nap paint roller with extension pole
- Paint tray
- Disposable gloves
- Painter’s tape
- Drop cloths/plastic sheeting
- Small paintbrush for edges
- Stirring stick
Step 2: Protect Areas Not Being Coated
Use painter’s tape and plastic sheeting to protect:
- ✅ Roof vents and fixtures
- ✅ Skylights
- ✅ Air conditioning units
- ✅ Solar panels
- ✅ Antenna
Step 3: Mix Coating Properly
Follow manufacturer instructions for mixing. Most camper roof coating products need thorough stirring before application. Never thin the coating unless specifically instructed by the manufacturer.
Step 4: Apply First Coat
Start at the rear of your camper and work forward:
- ✅ Pour a manageable amount of coating into your paint tray
- ✅ Use the paintbrush to coat edges and around fixtures first
- ✅ Apply coating with roller in even, overlapping strokes
- ✅ Maintain a wet edge to prevent lap marks
Apply at the manufacturer’s recommended thickness – too thin won’t provide adequate protection, while too thick can cause curing problems.
Step 5: Allow Proper Drying Time
Most coatings require 4-24 hours between coats, depending on temperature and humidity. Follow product instructions precisely.
Step 6: Apply Second Coat
For optimal protection, most camper roof coating systems require two coats. Apply the second coat perpendicular to the first for best coverage.
Step 7: Final Inspection
After the final coat has cured (typically 24-72 hours), inspect the entire roof for:
- ✅ Complete coverage with no thin spots
- ✅ Proper sealing around all fixtures and penetrations
- ✅ Smooth, consistent finish
⚠️ Common Camper Roof Coating Mistakes to Avoid
In my years of experience with RV maintenance, I’ve seen these common mistakes lead to coating failures:
Inadequate Cleaning
Applying camper roof coating over dirt, debris, or oxidation almost guarantees adhesion problems. Take the time to thoroughly clean and dry your roof.
Wrong Product for Roof Type
Using a coating not designed for your specific roof material can result in poor adhesion, premature failure, or even damage to the roof membrane. Always verify compatibility.
Skipping Repairs
Coating over existing damage won’t fix leaks or structural issues. Address all repairs before applying coating.
Ignoring Weather Conditions
Applying coating when it’s too cold, too hot, or rain is imminent can ruin your project. Be patient and wait for optimal conditions.
Insufficient Coverage
Stretching coating too thin to save money results in inadequate protection. Follow manufacturer coverage recommendations.
Camper Roof Coating Maintenance Tips
To maximize the lifespan of your camper roof coating:
Regular Inspections
Examine your roof at least twice yearly, ideally in spring and fall. Look for any signs of coating wear, cracking, or peeling.
Gentle Cleaning
Clean your coated roof 2-3 times per year with mild detergent and soft brush. Avoid harsh chemicals or pressure washers, which can damage the coating.
Prompt Touch-Ups
Address any damaged areas immediately. Keep a small amount of matching camper roof coating on hand for quick repairs.
Tree Protection
Whenever possible, park your camper away from trees that drop sap, berries, or branches which can damage your coating over time.
Winter Considerations
In snowy regions, periodically remove accumulated snow from your camper roof to prevent excess weight and moisture exposure.
❓ Frequently Asked Questions About Camper Roof Coating
How often should I recoat my camper roof?
This depends on your specific coating product, climate, and usage pattern. Generally:
- Economy coatings: Every 2-3 years
- Standard coatings: Every 3-5 years
- Premium coatings: Every 5-7 years
If you store your camper in harsh environments (extreme heat, UV exposure, or freezing conditions), you may need to recoat more frequently.
How much camper roof coating do I need?
To calculate required quantity:
- Measure your roof length and width
- Multiply to get square footage
- Add 15% for waste and vertical surfaces
- Divide by the coverage rate per gallon listed on your product
For example, a 30′ x 8′ camper roof is 240 sq ft. Adding 15% gives 276 sq ft. If your coating covers 75 sq ft per gallon, you’ll need approximately 3.7 gallons for two coats.
Can I apply camper roof coating over an existing coating?
In many cases, yes, but the existing coating must be in good condition, well-adhered, and compatible with the new product. Always test a small area first and follow manufacturer recommendations for applying over existing coatings.
Do I need to remove all old sealant before applying new camper roof coating?
You should remove any loose, cracked, or peeling sealant. Well-adhered sealant in good condition can usually remain if compatible with your new coating.
Can I use house paint or regular roof coating on my camper?
No! Regular house paint or residential roof coatings aren’t designed for the flexibility, UV resistance, and waterproofing requirements of mobile structures like campers. Always use products specifically formulated for RV/camper use.
Is camper roof coating a DIY project?
Yes, for most RV owners with basic DIY skills. The key is thorough preparation and following instructions precisely. A typical camper roof can be cleaned and coated in a weekend.
Ready to Protect Your Camper Investment? Act Now!
Don’t wait for leaks to develop! Click on any of our recommended camper roof coating products to secure the protection your RV deserves. With proper application, you’ll enjoy worry-free camping trips and save thousands on potential repair costs!
️ Conclusion: Investing in Your Camper’s Future
Applying quality camper roof coating is one of the wisest investments you can make in your RV’s longevity. A well-maintained roof protects everything beneath it – from your camper’s structure to all your interior comforts and personal belongings.
By understanding your roof type, choosing the right products, and following proper application techniques, you can easily add years to your camper’s lifespan while preventing costly water damage. Whether you’re a full-time RVer or weekend warrior, the peace of mind that comes from knowing your roof is properly protected is invaluable.
Remember that consistency is key – set regular inspection and maintenance schedules, and don’t postpone recoating when signs of wear become visible. Your camper is a significant investment, and protecting it from the top down is simply smart ownership.
Recommended for You:
- 10 Essential RV Maintenance Tips for Spring
- Best Solar Panels for Campers: Complete Buyer’s Guide
- How to Insulate Your Camper for Year-Round Comfort
Disclaimer: This article contains affiliate links. If you purchase products through these links, we may earn a small commission at no additional cost to you.
Camper Roof Coating: 10 Best Solutions for Long-Lasting Protection
Is your camper roof showing signs of wear and tear? Or maybe you’re just being proactive about maintenance? Either way, finding the right camper roof coating can save you thousands in potential repair costs while extending the lifespan of your beloved recreational vehicle. As someone who has restored multiple RV roofs and helped countless fellow campers protect their investments, I’m here to share everything you need to know about camper roof coating options, application techniques, and the best products currently available.
Camper roof coating is essential for maintaining the integrity of your RV’s roof, preventing leaks, and protecting against UV damage. With the right coating solution, you can add years to your camper’s life while avoiding costly repairs down the road. Let’s dive into the world of protective roof coatings and find the perfect solution for your specific needs.
Understanding Camper Roof Coating: What You Need to Know
Before we explore specific products and application methods, it’s important to understand why camper roof coating matters so much. Your RV’s roof is constantly exposed to harsh elements – scorching sun, heavy rain, hail, snow, and branches scraping overhead. Over time, these factors can degrade even the most durable roof materials.
A quality camper roof coating creates a protective barrier that:
- ✅ Seals existing minor leaks and prevents new ones
- ✅ Reflects UV rays, reducing heat buildup inside your camper
- ✅ Extends the lifespan of your roof materials
- ✅ Improves energy efficiency (less need for air conditioning)
- ✅ Adds an attractive finish to your RV
Many camper owners don’t realize that roof maintenance isn’t just optional – it’s essential for preventing catastrophic damage. A small leak today can lead to rotted wood, mold growth, and damaged interiors tomorrow. Regular application of camper roof coating can be the difference between a minor maintenance expense and a major renovation project.
️ Types of Camper Roof Materials and Compatible Coatings
Before selecting a camper roof coating, you need to identify what material your RV roof is made from. Different roof types require specific coating products for optimal performance and adhesion.
EPDM Rubber Roofs
EPDM (Ethylene Propylene Diene Monomer) rubber is one of the most common camper roof materials. These black or white membrane roofs are durable but can dry out, crack, and chalk over time.
For EPDM roofs, look for:
- Rubber-specific coatings
- Products containing acrylic or latex
- UV-protective formulations
One excellent option for EPDM roofs is Dicor RPCRC1 Rubber Roof Acrylic Coating, which bonds exceptionally well to rubber surfaces while providing superior UV protection.
TPO and PVC Roofs
TPO (Thermoplastic Olefin) and PVC roofs are becoming increasingly popular in newer RVs and campers. These white or light-colored single-ply membranes offer excellent durability and heat reflection.
For TPO/PVC roofs, consider:
- Silicone-based coatings
- Products specifically labeled as TPO-compatible
- Self-leveling formulations
The Liquid Rubber RV Roof Coating works exceptionally well on TPO surfaces, creating a waterproof membrane that flexes with your roof’s natural movement.
Fiberglass and Aluminum Roofs
Some higher-end campers feature fiberglass or aluminum roofs, which have different coating requirements.
For these surfaces, seek out:
- Marine-grade coatings
- Metal-specific products for aluminum
- Gel coat restoration products for fiberglass
The KST COATING KST063600-20 Elastomeric Roof Coating performs admirably on both fiberglass and aluminum surfaces.
⚡ Top Benefits of Regular Camper Roof Coating
Investing in quality camper roof coating offers numerous advantages beyond simple leak protection:
Extended Roof Lifespan
A properly coated roof can last up to twice as long as an unprotected one. By creating a barrier against UV rays and moisture, coating prevents the premature breakdown of roofing materials. I’ve personally seen 15-year-old camper roofs in excellent condition thanks to regular coating maintenance.
Temperature Regulation
White or reflective camper roof coating can dramatically reduce interior temperatures by reflecting solar heat away from your RV. This can make a 10-15°F difference on hot summer days, reducing air conditioning costs and improving comfort.
Prevent Costly Water Damage
Even minor roof leaks can cause extensive damage to interior structures, insulation, and electrical systems. Waterproof camper roof coating creates a seamless membrane that prevents moisture intrusion. One fellow RVer told me they saved over $5,000 in potential repair costs by catching and coating a weakened roof section before leaks developed.
Improved Aesthetics
Let’s face it – a chalky, oxidized roof looks terrible. Fresh coating restores your camper’s appearance, increasing both pride of ownership and resale value.
Easy Maintenance
Coated roofs are typically easier to clean and maintain than uncoated surfaces. Many products also contain mildew inhibitors that prevent biological growth.
Best Camper Roof Coating Products for 2025
After testing dozens of products and gathering feedback from the RV community, I’ve compiled this list of the best camper roof coating options currently available:
1. Best Overall: Liquid Rubber RV Roof Coating
This water-based sealant creates a flexible, waterproof membrane that works on virtually all roof types. What makes it stand out is its excellent UV resistance and self-leveling properties.
Pros:
- ✅ Extremely durable (5+ years between recoats)
- ✅ Easy water cleanup
- ✅ Low VOCs and minimal odor
- ✅ Excellent elasticity for seasonal expansion/contraction
Cons:
- ❌ Requires multiple coats for optimal protection
- ❌ Premium price point
2. Best Budget Option: Henry HE587372 Roof Coating
This acrylic-based coating provides excellent value while still delivering reliable protection. It’s particularly well-suited for EPDM rubber roofs.
Pros:
- ✅ Affordable price per square foot
- ✅ Good UV reflection
- ✅ Easy application with roller or sprayer
Cons:
- ❌ May require more frequent reapplication (2-3 years)
- ❌ Less flexible than premium options
3. Best for EPDM Roofs: Dicor RPCRC1 Rubber Roof Acrylic Coating
Specifically formulated for rubber roofs, this coating bonds exceptionally well to EPDM surfaces and provides outstanding protection against UV damage.
Pros:
- ✅ Exceptional adhesion to rubber
- ✅ Prevents chalking and oxidation
- ✅ Can lower interior temperatures by up to 20%
Cons:
- ❌ Not suitable for all roof types
- ❌ Requires specific primer
4. Best Long-Term Solution: Kool Seal KS0063600-20 White Elastomeric Roof Coating
This premium elastomeric coating creates an exceptionally durable membrane that can last 7+ years between applications.
Pros:
- ✅ Superior longevity
- ✅ Extreme weather resistance
- ✅ Exceptional flexibility
- ✅ Works on most roof types
Cons:
- ❌ Higher initial investment
- ❌ Longer cure time
5. Best for TPO Roofs: Proguard F99911 Liquid Roof Coating
This specialized coating is one of the few products truly compatible with TPO membranes, creating an excellent bond and long-lasting protection.
Pros:
- ✅ Specifically formulated for TPO compatibility
- ✅ One-coat application possible
- ✅ Outstanding leak prevention
Cons:
- ❌ Higher cost per square foot
- ❌ Strong initial odor
Product Comparison: Top Camper Roof Coatings
| Product | Best For | Coverage per Gallon | Lifespan | Price Range |
|---|---|---|---|---|
| Liquid Rubber RV Roof Coating | All roof types | 50-60 sq. ft. | 5-7 years | $$$ |
| Henry HE587372 Roof Coating | EPDM, Budget-conscious | 75-90 sq. ft. | 2-3 years | $ |
| Dicor RPCRC1 Acrylic Coating | EPDM only | 125 sq. ft. | 3-5 years | $$ |
| Kool Seal KS0063600-20 | Long-term protection | 50-75 sq. ft. | 7+ years | $$$ |
| Proguard F99911 Liquid Roof | TPO roofs | 40-50 sq. ft. | 5-6 years | $$$ |
Don’t Miss These Exclusive Camper Roof Coating Deals!

Protect your investment with these top-rated camper roof coating products! Click on any highlighted product to check current pricing and availability on Amazon. These specially formulated coatings will shield your RV from the elements and extend your roof’s lifespan for years to come!
Preparing Your Camper Roof for Coating
Proper preparation is absolutely crucial for camper roof coating success. Skipping these steps almost guarantees adhesion problems, premature failure, and wasted money.
Step 1: Thorough Cleaning
Start by removing all debris, leaves, and loose material from your roof. Then:
- ✅ Clean the entire roof with appropriate cleaner (EPDM cleaner for rubber, mild detergent for other surfaces)
- ✅ Use a medium-bristle brush to scrub away dirt and oxidation
- ✅ Rinse thoroughly with clean water
- ✅ Allow to dry completely (24+ hours in good weather)
I recommend using Dicor RP-RC-1GL EPDM Rubber Roof Cleaner for rubber roofs, as it removes oxidation without damaging the membrane.
Step 2: Inspect and Repair
With a clean roof, you can now properly assess its condition:
- ✅ Check all seams and edges for separation
- ✅ Look for cracks, tears, or punctures in the membrane
- ✅ Test for soft spots that might indicate water damage below
- ✅ Examine sealant around roof penetrations (vents, AC units, etc.)
Address any issues before coating application. For seams and small repairs, Dicor 501LSW-1 Self-Leveling Lap Sealant works wonders on most camper roofs.
Step 3: Apply Primer (If Required)
Some coating systems require a specific primer for proper adhesion. Check your selected product’s instructions and apply primer if needed.
For EPDM roofs, Dicor RP-CRP-1GL EPDM Rubber Roof Primer creates an excellent base for coating adhesion.
Step 4: Weather Considerations
Plan your camper roof coating project carefully around weather conditions:
- ✅ Temperature should be 50-90°F (10-32°C)
- ✅ Humidity should be below 80%
- ✅ No rain forecast for 24-48 hours
- ✅ Minimal wind to prevent debris contamination
️ How to Apply Camper Roof Coating: Step-by-Step Guide
Once your roof is properly prepared, follow these steps for a successful coating application:
Step 1: Gather Your Tools
You’ll need:
- Medium-nap paint roller with extension pole
- Paint tray
- Disposable gloves
- Painter’s tape
- Drop cloths/plastic sheeting
- Small paintbrush for edges
- Stirring stick
Step 2: Protect Areas Not Being Coated
Use painter’s tape and plastic sheeting to protect:
- ✅ Roof vents and fixtures
- ✅ Skylights
- ✅ Air conditioning units
- ✅ Solar panels
- ✅ Antenna
Step 3: Mix Coating Properly
Follow manufacturer instructions for mixing. Most camper roof coating products need thorough stirring before application. Never thin the coating unless specifically instructed by the manufacturer.
Step 4: Apply First Coat
Start at the rear of your camper and work forward:
- ✅ Pour a manageable amount of coating into your paint tray
- ✅ Use the paintbrush to coat edges and around fixtures first
- ✅ Apply coating with roller in even, overlapping strokes
- ✅ Maintain a wet edge to prevent lap marks
Apply at the manufacturer’s recommended thickness – too thin won’t provide adequate protection, while too thick can cause curing problems.
Step 5: Allow Proper Drying Time
Most coatings require 4-24 hours between coats, depending on temperature and humidity. Follow product instructions precisely.
Step 6: Apply Second Coat
For optimal protection, most camper roof coating systems require two coats. Apply the second coat perpendicular to the first for best coverage.
Step 7: Final Inspection
After the final coat has cured (typically 24-72 hours), inspect the entire roof for:
- ✅ Complete coverage with no thin spots
- ✅ Proper sealing around all fixtures and penetrations
- ✅ Smooth, consistent finish
⚠️ Common Camper Roof Coating Mistakes to Avoid
In my years of experience with RV maintenance, I’ve seen these common mistakes lead to coating failures:
Inadequate Cleaning
Applying camper roof coating over dirt, debris, or oxidation almost guarantees adhesion problems. Take the time to thoroughly clean and dry your roof.
Wrong Product for Roof Type
Using a coating not designed for your specific roof material can result in poor adhesion, premature failure, or even damage to the roof membrane. Always verify compatibility.
Skipping Repairs
Coating over existing damage won’t fix leaks or structural issues. Address all repairs before applying coating.
Ignoring Weather Conditions
Applying coating when it’s too cold, too hot, or rain is imminent can ruin your project. Be patient and wait for optimal conditions.
Insufficient Coverage
Stretching coating too thin to save money results in inadequate protection. Follow manufacturer coverage recommendations.
Camper Roof Coating Maintenance Tips
To maximize the lifespan of your camper roof coating:
Regular Inspections
Examine your roof at least twice yearly, ideally in spring and fall. Look for any signs of coating wear, cracking, or peeling.
Gentle Cleaning
Clean your coated roof 2-3 times per year with mild detergent and soft brush. Avoid harsh chemicals or pressure washers, which can damage the coating.
Prompt Touch-Ups
Address any damaged areas immediately. Keep a small amount of matching camper roof coating on hand for quick repairs.
Tree Protection
Whenever possible, park your camper away from trees that drop sap, berries, or branches which can damage your coating over time.
Winter Considerations
In snowy regions, periodically remove accumulated snow from your camper roof to prevent excess weight and moisture exposure.
❓ Frequently Asked Questions About Camper Roof Coating
How often should I recoat my camper roof?
This depends on your specific coating product, climate, and usage pattern. Generally:
- Economy coatings: Every 2-3 years
- Standard coatings: Every 3-5 years
- Premium coatings: Every 5-7 years
If you store your camper in harsh environments (extreme heat, UV exposure, or freezing conditions), you may need to recoat more frequently.
How much camper roof coating do I need?
To calculate required quantity:
- Measure your roof length and width
- Multiply to get square footage
- Add 15% for waste and vertical surfaces
- Divide by the coverage rate per gallon listed on your product
For example, a 30′ x 8′ camper roof is 240 sq ft. Adding 15% gives 276 sq ft. If your coating covers 75 sq ft per gallon, you’ll need approximately 3.7 gallons for two coats.
Can I apply camper roof coating over an existing coating?
In many cases, yes, but the existing coating must be in good condition, well-adhered, and compatible with the new product. Always test a small area first and follow manufacturer recommendations for applying over existing coatings.
Do I need to remove all old sealant before applying new camper roof coating?
You should remove any loose, cracked, or peeling sealant. Well-adhered sealant in good condition can usually remain if compatible with your new coating.
Can I use house paint or regular roof coating on my camper?
No! Regular house paint or residential roof coatings aren’t designed for the flexibility, UV resistance, and waterproofing requirements of mobile structures like campers. Always use products specifically formulated for RV/camper use.
Is camper roof coating a DIY project?
Yes, for most RV owners with basic DIY skills. The key is thorough preparation and following instructions precisely. A typical camper roof can be cleaned and coated in a weekend.
Ready to Protect Your Camper Investment? Act Now!
Don’t wait for leaks to develop! Click on any of our recommended camper roof coating products to secure the protection your RV deserves. With proper application, you’ll enjoy worry-free camping trips and save thousands on potential repair costs!
️ Conclusion: Investing in Your Camper’s Future
Applying quality camper roof coating is one of the wisest investments you can make in your RV’s longevity. A well-maintained roof protects everything beneath it – from your camper’s structure to all your interior comforts and personal belongings.
By understanding your roof type, choosing the right products, and following proper application techniques, you can easily add years to your camper’s lifespan while preventing costly water damage. Whether you’re a full-time RVer or weekend warrior, the peace of mind that comes from knowing your roof is properly protected is invaluable.
Remember that consistency is key – set regular inspection and maintenance schedules, and don’t postpone recoating when signs of wear become visible. Your camper is a significant investment, and protecting it from the top down is simply smart ownership.
More FAQs:
❓ What is the best type of camper roof coating?
❓ How often should I reapply camper roof coating?
❓ Can I apply camper roof coating myself?
❓ How long does camper roof coating take to dry?
❓ Does camper roof coating help with insulation?
Recommended for You:
- 10 Best Camp Trunk Options for Your Child’s Summer Adventure (2025 Guide)
- 10 Best Camping Sink Options for Your Outdoor Adventures in 2025
- 10 Best Camping Shower Tent Options for Outdoor Enthusiasts in 2025
Disclaimer: This article contains affiliate links. If you purchase products through these links, we may earn a small commission at no additional cost to you.