In This Article
Picture this: You wake up at dawn in the Sierra backcountry, ready to enjoy your carefully planned breakfast, only to discover a grizzly has rolled your food cache down a mountainside. Not the start you envisioned for day three of your trek, right?
A bear canister for backpacking isn’t just another piece of gear — it’s your insurance policy against wildlife encounters and the key to protecting both your food supply and bear populations. Since many national parks and wilderness areas now mandate bear resistant containers, choosing the right one can make or break your backcountry experience.
I’ve spent countless nights in bear country across North America, from Yosemite’s granite peaks to the Adirondacks’ dense forests. Through trial, error, and plenty of midnight bear visits (thankfully unsuccessful ones), I’ve learned what separates a reliable bear vault from a glorified Tupperware container. This comprehensive guide shares real-world testing insights on the top seven IGBC approved containers that actually work.
Whether you’re tackling the John Muir Trail or planning a weekend escape, you need a lightweight bear canister that won’t crush your spirit (or your shoulders) while keeping your provisions secure. Let’s dive into what makes these critter proof storage solutions essential for modern backpacking and how to choose the perfect one for your adventures.
Quick Comparison Table
| Product | Weight | Volume Capacity | Price Range | Best For | IGBC Certified |
|---|---|---|---|---|---|
| BearVault BV500 | 2 lbs 9 oz | 700 cu in (7 days) | $95-$100 | Most backpackers | ✅ Yes |
| Grubcan Carbon 6.6 | 1 lb 15 oz | 6.6L (5-6 days) | $650 | Ultralight enthusiasts | ✅ Yes |
| Counter Assault Bear Keg | 3 lbs 11 oz | 716 cu in (6-8 days) | $75-$85 | Budget & groups | ✅ Yes |
| Bearikade Weekender | 1 lb 15 oz | 656 cu in (6-7 days) | $359 | Serious hikers | ✅ Yes |
| BearVault BV450 | 2 lbs 1 oz | 440 cu in (2-4 days) | $85-$90 | Weekend trips | ✅ Yes |
| Ursack Major | 7.8 oz | 650 cu in (5 days) | $85-$95 | Flexible packing | ✅ Yes |
| Garcia Backpackers Cache | ~3 lbs | 700 cu in | $75-$80 | Durability first | ✅ Yes |
💬 Just one click – help others make better buying decisions too!😊
Top 7 Bear Canisters: Expert Analysis
1. BearVault BV500 — The Gold Standard for Most Backpackers
When I first started backpacking in the Sierras, everyone at the trailhead had one of these transparent cylinders strapped to their packs. There’s a reason the BearVault BV500 has become the default choice for thousands of backpackers.
Key Specifications:
- Weight: 2 lbs 9 oz
- Capacity: 700 cubic inches (about 7 days of food for solo hikers)
- Tool-free opening mechanism
- Price: $95-$100
This bear resistant container strikes the perfect balance between capacity and portability. The clear polycarbonate construction lets you see what’s inside without unpacking everything — a godsend when you’re searching for that specific energy bar at lunch. The screw-top lid features an ingenious tab system that confounds bears but opens easily for humans (though I recommend practicing at home first; cold fingers struggle with it).
Customer feedback consistently praises its universal park approval and reasonable weight. One PCT hiker mentioned fitting eight days of dehydrated meals by using the repacking method. However, some users in the Adirondacks report that one particularly clever bear named Yellow-Yellow learned to crack the code, though BearVault has since updated the locking mechanism.
✅ Pros:
- Accepted in all major national parks
- Tool-free opening (no coins needed)
- Transparent design for easy visibility
❌ Cons:
- Can be tricky to open in cold weather
- Slightly heavier than premium ultralight options
Perfect for: Solo hikers and couples on 5-7 day trips who want reliable, widely-accepted protection without breaking the bank.
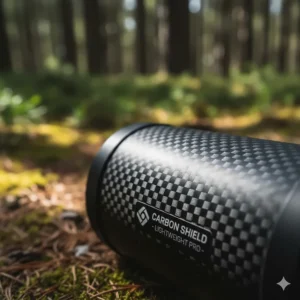
2. Grubcan Carbon 6.6 — The Ultralight Champion
For weight-obsessed backpackers, the Grubcan Carbon 6.6 represents the cutting edge of bear canister technology. Weighing just under two pounds, this marvel of aerospace engineering uses the same carbon fiber and Kevlar materials found in bulletproof panels.
Key Specifications:
- Weight: 1 lb 15 oz
- Capacity: 6.6 liters (5-6 days with efficient packing)
- Unique combo-ring locking system
- Price: $650 (rental program available at $7-10/day)
I tested this on a week-long Sierra traverse, and the weight savings were immediately noticeable. The wavy exterior and opaque construction confuse bears, while the three-ring locking mechanism opens easily for humans once you learn the technique. It’s the first canister to pass the Wildlife Management Institute’s black bear test.
Customer reviews highlight the incredibly thoughtful rental program — perfect for occasional users who balk at the premium price. One JMT hiker noted: “The narrow opening requires strategic packing, but the weight savings on a 22-day trip was absolutely worth it.”
✅ Pros:
- Lightest certified canister per volume
- WMI and IGBC certified
- Affordable rental program
❌ Cons:
- Premium price tag
- Narrow opening requires careful packing
Perfect for: Thru-hikers and gram-counting backpackers willing to invest in the best ultralight technology.
3. Counter Assault Bear Keg — The Indestructible Workhorse
The Counter Assault Bear Keg is the tank of bear canisters. At nearly four pounds, it’s not winning any ultralight awards, but this bright yellow fortress has protected countless food supplies since its introduction.
Key Specifications:
- Weight: 3 lbs 11 oz
- Capacity: 716 cubic inches
- Three stainless steel locks
- Price: $75-$85
Built from tough proprietary polymer, this bear vault review consistently earns praise for bulletproof construction. The reflective stripe around the middle makes it easy to locate at night — crucial when you hear rustling near your food storage area. Opening requires a coin, key, or multitool to turn three recessed latches.
Users love its affordability and universal acceptance. One group backpacker shared: “We split this among three people for weekend trips in the Adirondacks. Yes, it’s heavy, but we’ve never worried about bears getting in.” The main complaint? It takes up significant pack space and only fits vertically in larger backpacks (60L+).
✅ Pros:
- Extremely durable construction
- Budget-friendly pricing
- Reflective stripe for night visibility
❌ Cons:
- Heaviest option per volume
- Requires tool to open (quarter or screwdriver)
Perfect for: Groups splitting the weight, car campers, or backpackers prioritizing durability over weight savings.
4. Bearikade Weekender — The Premium Performer
Wild Ideas’ Bearikade Weekender represents aerospace-grade engineering applied to backcountry food storage. This carbon fiber composite canister weighs just 31 ounces while holding a week’s worth of food for solo hikers.
Key Specifications:
- Weight: 1 lb 15 oz (31 oz)
- Capacity: 656 cubic inches
- Carbon fiber composite construction
- Price: $359
Handcrafted in the USA, each unit features a unique serial number and aircraft-grade aluminum caps. The wide opening — the original design innovation — makes packing infinitely easier than narrow alternatives. The quarter-turn fasteners open with any coin or flat object.
Long-term users report impressive durability. One owner mentioned using the same Weekender for ten years across 20-30 nights annually with minimal wear. The resale value remains exceptionally high (often 80-90% of retail), making it a solid investment.
✅ Pros:
- Exceptional strength-to-weight ratio
- Largest opening in its class
- Strong resale value
❌ Cons:
- High upfront cost
- Limited availability
Perfect for: Serious backpackers making significant mileage investments who want the best weight-to-capacity ratio.
5. BearVault BV450 — The Weekend Warrior
The BearVault BV450 offers the same proven design as its larger sibling in a more compact package ideal for shorter trips.
Key Specifications:
- Weight: 2 lbs 1 oz
- Capacity: 440 cubic inches (2-4 days)
- Same tool-free opening as BV500
- Price: $85-$90
This smaller bear resistant container fits more easily into ultralight packs while maintaining the transparent, user-friendly design BearVault is known for. I’ve used mine for countless weekend trips, appreciating how it slides horizontally into my 50L pack.
Customer feedback emphasizes its versatility for solo weekend trips or as a two-person option for overnight adventures. One reviewer noted: “Perfect size for my wife and me on Friday-Sunday trips. Anything longer and we’d need the BV500.”
✅ Pros:
- Fits smaller ultralight packs
- Lower price point than BV500
- Wide opening for easy access
❌ Cons:
- Limited capacity for longer trips
- Same cold-weather opening challenges as BV500
Perfect for: Weekend warriors and ultralight backpackers on 2-4 day adventures.
6. Ursack Major — The Flexible Alternative
The Ursack Major takes a completely different approach to bear protection. Instead of hard-sided rigidity, this bag uses ultra-high-performance UHMWPE fabric (similar to bulletproof materials) to prevent bears from tearing into your food.
Key Specifications:
- Weight: 7.8 oz
- Capacity: 10.65 liters (650 cubic inches, about 5 days)
- Requires proper tying to trees
- Price: $85-$95
At under half a pound, the weight savings are dramatic. The bag compresses as you eat food, unlike rigid canisters that maintain full size regardless of contents. It requires tying to a tree with proper knots — a learning curve that intimidates some users but becomes second nature with practice.
Important note: While IGBC certified, some parks don’t accept Ursacks. Always verify with your specific destination. Reviewers recommend pairing with an OPSak odor-barrier bag for best results. One long-distance hiker shared: “Six years of use, multiple trips annually. Easy to pack for 6 days with 2500 calories daily.”
✅ Pros:
- Exceptionally lightweight (7.8 oz)
- Compresses as food depletes
- Highly packable
❌ Cons:
- Not accepted in all parks
- Requires proper knot-tying skills
- Food can get crushed (aluminum liner sold separately)
Perfect for: Experienced backpackers in areas where Ursacks are permitted who prioritize weight above all else.
7. Garcia Backpackers Cache — The Original Classic
The Garcia Backpackers Cache represents the original design that established modern bear canister standards. While heavier than newer models, its reliability remains unmatched.
Key Specifications:
- Weight: Approximately 3 lbs
- Capacity: 700 cubic inches
- ABS polymer construction
- Price: $75-$80
This opaque, rounded canister has protected food supplies for decades. The smooth plastic and rounded corners give bears nothing to grip, while the coin-operated locks provide secure closure. Many rental programs at national parks still use Garcia canisters, testament to their durability.
Users appreciate the bombproof construction and universal acceptance. The main drawbacks mirror the Bear Keg: significant weight and the need for tools to open. However, at this price point with proven reliability, it remains a solid choice for occasional users.
✅ Pros:
- Time-tested reliability
- Widely available for rent
- Budget-friendly
❌ Cons:
- Heavy for its volume
- Opaque (can’t see contents)
Perfect for: First-time buyers, rental agencies, and backpackers prioritizing cost and reliability over weight.
Understanding Bear Canisters: Why They Matter
The Science Behind Bear Resistant Containers
Bear canisters for backpacking serve a dual purpose that many hikers don’t fully appreciate. Yes, they protect your food from hungry bruins with jaw strength exceeding 1,000 PSI. But more importantly, they protect bears from us.
According to the Interagency Grizzly Bear Committee (IGBC), a “food-conditioned” bear — one that has successfully obtained human food — faces a grim future. These bears become aggressive, approach campsites more frequently, and ultimately get relocated or euthanized. The mantra “a fed bear is a dead bear” isn’t hyperbole; it’s conservation reality backed by decades of wildlife management data.
The National Park Service reports that proper food storage has dramatically reduced bear incidents in popular wilderness areas. In Yosemite alone, bear-related property damage dropped over 90% after implementing mandatory canister requirements in the backcountry.
IGBC Certification: What It Really Means
Not all bear canisters are created equal. IGBC approved containers must survive at least 60 minutes of determined grizzly contact — biting, clawing, pounding, and problem-solving by multiple test bears at facilities like the Grizzly & Wolf Discovery Center in West Yellowstone, Montana.
The testing is surprisingly rigorous. Bears are intelligent, persistent, and strong enough to crush most household containers instantly. During tests, canisters are baited with irresistible attractants (think honey-covered peanut butter) to motivate maximum effort. Less than 5% of submitted designs pass certification.
Key IGBC requirements include:
- No gaps, seams, or openings larger than 1/4 inch
- Smooth exterior with minimal grip points
- Locking mechanism complex enough to foil bears but simple for humans
- Durable construction that withstands repeated impacts
Hard-Sided vs. Soft-Sided: The Great Debate
The lightweight bear canister conversation inevitably leads to the Ursack debate. Hard-sided canisters offer superior crush protection and wider park acceptance. They also double as camp stools and keep your food pristine.
Soft-sided options like the Ursack Major deliver dramatic weight savings but come with trade-offs. Your food might get flattened (though protected from teeth), and you’ll need to master proper hanging techniques. More critically, acceptance varies by jurisdiction — always verify before your trip.
BearWise.org, developed by state agency bear biologists, recommends hard-sided canisters for most backpackers due to simplicity and universal acceptance.
How to Choose the Right Bear Canister for Backpacking
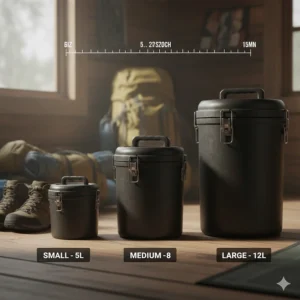
1. Calculate Your Volume Capacity Food Needs
Trip duration dictates capacity requirements. A common formula: 100 cubic inches per person per day for freeze-dried meals, plus 50-75 cubic inches for snacks and breakfast items.
Quick Reference:
- 2-3 days solo: 300-450 cubic inches (BV450, Ursack Scout)
- 4-7 days solo: 600-750 cubic inches (BV500, Bearikade Weekender)
- Week+ solo or 2-3 days duo: 900+ cubic inches (Bearikade Expedition, dual canisters)
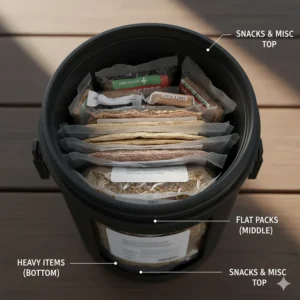
Pro tip: Practice the “repackaging method” before your trip. Remove bulky commercial packaging, consolidate items in resealable bags, and force out excess air. I’ve fit eight days into a BV500 using this technique.
2. Consider Weight vs. Trip Length
The weight penalty matters more on longer trips. Carrying an extra pound for a weekend getaway? Manageable. That same pound over 220 miles on the John Muir Trail? Painful.
Weight Efficiency Ranking (ounces per 100 cubic inches):
- Grubcan Carbon 6.6: 4.5 oz/100 cu in
- Bearikade Weekender: 4.7 oz/100 cu in
- Ursack Major: 1.2 oz/100 cu in (note: different design)
- BearVault BV500: 5.8 oz/100 cu in
- Counter Assault Bear Keg: 8.3 oz/100 cu in
3. Verify Park Requirements
This step is non-negotiable. Different jurisdictions maintain approved lists, and showing up with an unapproved canister means denial of your wilderness permit.
Major Park Requirements:
- Yosemite National Park: Requires IGBC-certified canisters in all backcountry areas
- Sequoia & Kings Canyon: Hard-sided canisters only; Ursacks not permitted
- Rocky Mountain National Park: All wilderness areas require hard-sided containers
- Adirondack Park (NY): Seasonal requirements in high-use areas
Check the IGBC food storage regulations map before finalizing your gear list.
4. Evaluate Opening Mechanisms
Cold fingers at 5:30 AM shouldn’t prevent breakfast access. Test your preferred model before purchasing:
Tool-Free Systems (BearVault, Grubcan): Convenient but can be stiff in cold weather. Practice the technique repeatedly.
Coin/Tool Required (Bear Keg, Bearikade, Garcia): Simple mechanics, but you MUST pack the tool. I keep a quarter taped inside my first aid kit as backup.
5. Assess Portability
Can you fit it inside your pack, or will it ride externally? Internal carry improves balance and protects the canister, but requires adequate pack volume.
Pack Compatibility Guide:
- 40-50L packs: BV450, Ursack Major
- 50-65L packs: BV500 (may fit horizontally), Bearikade Weekender
- 65L+ packs: Any canister, multiple options
External carry works but affects balance on technical terrain. I prefer vertical internal packing with clothing stuffed around the canister for stability.
Proper Usage Tips for Maximum Protection
Strategic Placement Matters
Where you place your bear canister for backpacking dramatically impacts effectiveness. Follow these guidelines:
Distance Requirements:
- Minimum 100 feet from sleeping area
- Minimum 100 feet from cooking area
- Away from water sources
- Never near cliffs (bears roll canisters)
Optimal Placement:
- Flat, stable ground
- Open areas visible from camp
- Downwind from sleeping area
- Away from game trails
Maximizing Critter Proof Storage
Your IGBC approved container only works if used correctly:
- Always lock it — Even during the day when you’re around camp. Opportunistic bears move fast.
- Store ALL scented items — Toothpaste, sunscreen, lip balm, wrappers, gum. If it has an odor, it goes in the canister.
- Clean the exterior — Wipe down after handling food. Bears detect residual scents.
- Don’t tie ropes — This gives bears leverage. Place canisters on the ground as designed.
- Remove packaging — Less bulk equals more capacity. Use resealable bags.
Cold Weather Considerations
Polycarbonate becomes brittle below freezing. Screw-top mechanisms get stiff. Combat these challenges:
- Store canister in tent vestibule overnight to keep slightly warmer
- Warm hands before attempting to open
- Apply food-safe silicone lubricant to threads (sparingly)
- Consider coin-operated models for winter trips
Benefits vs Traditional Food Storage Methods
| Method | Pros | Cons | Best Use |
|---|---|---|---|
| Bear Canisters | Most reliable, no trees needed, doubles as camp stool | Heavy, expensive, takes pack space | Required areas, beginners, most reliable |
| Bear Hang | Lightweight, no cost | Requires perfect tree, skill-dependent, time-consuming | Low bear activity, experienced users |
| Ursack Bags | Ultralight (8 oz), packable | Not universally accepted, food can crush | Approved areas, weight-critical trips |
| Bear Lockers | Zero weight penalty | Only at designated sites, limits flexibility | Car camping, developed campgrounds |
The bear resistant container wins for most backpackers because it eliminates variables. No searching for suitable trees at dusk. No complicated rigging. Just lock and walk away.
Price Range & Value Analysis
Budget Options ($75-$100)
The Counter Assault Bear Keg and Garcia Backpackers Cache deliver proven protection without premium pricing. Weight penalty exists, but reliability compensates. Consider these for occasional use or if renting isn’t available.
Rental programs offer even better value: $5-10 per day from park ranger stations or outfitters. Perfect for once-yearly trips.
Mid-Range Champions ($85-$110)
BearVault BV500 and BV450 own this category. The sweet spot for most backpackers — reasonable weight, universal acceptance, tool-free operation, and price points that don’t require a second mortgage.
Premium Performance ($350-$650)
Bearikade and Grubcan canisters command premium prices through dramatic weight savings and superior engineering. Calculate your return on investment:
- 12 oz weight savings over BV500
- 200 miles of backpacking annually
- 10-year lifespan
That’s 150 pounds of cumulative weight savings — worth considering for dedicated backcountry travelers. The strong resale market (80-90% of purchase price) further justifies the investment.
Maintenance & Longevity Tips
Proper care extends canister life dramatically:
Cleaning Protocol
- After every trip: Wash with mild soap and water
- Deep clean monthly: Scrub threads with toothbrush
- Remove residue: Use vinegar solution for stubborn odors
- Dry completely: Prevent mold in locking mechanisms
Storage Best Practices
- Store with lid slightly loose (prevents seal compression)
- Keep in cool, dry location
- Avoid direct sunlight (UV degrades polycarbonate)
- Apply food-safe lubricant to threads annually
Damage Prevention
- Never drop from height
- Avoid impacts on rocks
- Don’t overtighten locking mechanisms
- Inspect seals regularly for wear
Most quality canisters last 10-15 years with proper care. I’ve seen BearVaults still functioning after 20+ years of seasonal use.
Common Mistakes to Avoid
1. Ignoring Park-Specific Requirements
Assuming IGBC certification equals universal acceptance causes permit problems. Always verify with your specific destination.
2. Inadequate Repacking
Showing up with factory packaging wastes 30-40% of capacity. Repack everything before hitting the trail.
3. Improper Placement
Placing canisters too close to camp defeats the purpose. That 100-foot minimum isn’t a suggestion.
4. Neglecting All Scented Items
Leaving chapstick in your pocket or toothpaste in your tent attracts bears just as effectively as food.
5. Attempting to Hang Hard-Sided Canisters
These aren’t designed for hanging. Drops from height cause cracks and compromise integrity.
6. Buying Wrong Size
Overestimating capacity leads to frustration. Calculate carefully and rent first if uncertain.
FAQ
❓ How much food fits in a bear canister for backpacking?
❓ What is the lightest IGBC approved container available?
❓ Can bears really open twist-top containers?
❓ Are Ursack bags accepted in Yosemite and Sequoia?
❓ How do I fit a bear canister in a 50 liter pack?
Conclusion: Protecting Bears and Your Adventures
Choosing the right bear canister for backpacking comes down to balancing weight, capacity, budget, and destination requirements. The BearVault BV500 remains the gold standard for most backpackers — it offers universal acceptance, reasonable weight, and proven reliability at a fair price point.
For ultralight enthusiasts willing to invest, the Grubcan Carbon 6.6 or Bearikade Weekender deliver exceptional weight savings that compound over long-distance trips. Budget-conscious adventurers find excellent value in the Counter Assault Bear Keg, especially when sharing weight among groups.
Remember, your IGBC approved container does more than protect tonight’s dinner. It safeguards entire bear populations from food conditioning that leads to relocation or euthanization. Every properly stored meal contributes to keeping bears wild and wilderness areas accessible for future generations.
Before purchasing, verify your destination’s specific requirements, calculate your volume capacity food needs accurately, and consider renting for your first few trips. The right critter proof storage solution transforms from annoying regulation into peace-of-mind insurance you’ll appreciate at 2 AM when you hear rustling outside your tent.
Get out there, enjoy the backcountry responsibly, and sleep soundly knowing your provisions are secure and bears remain wild.
Recommended for You
- 7 Best Bear Spray 2026: Ultimate Protection Guide
- 7 Best Garmin inReach Review Camping 2026
- 7 Best Handheld GPS for Hiking 2026
Disclaimer: This article contains affiliate links. If you purchase products through these links, we may earn a small commission at no additional cost to you.
✨ Found this helpful? Share it with your friends! 💬🤗