
In This Article
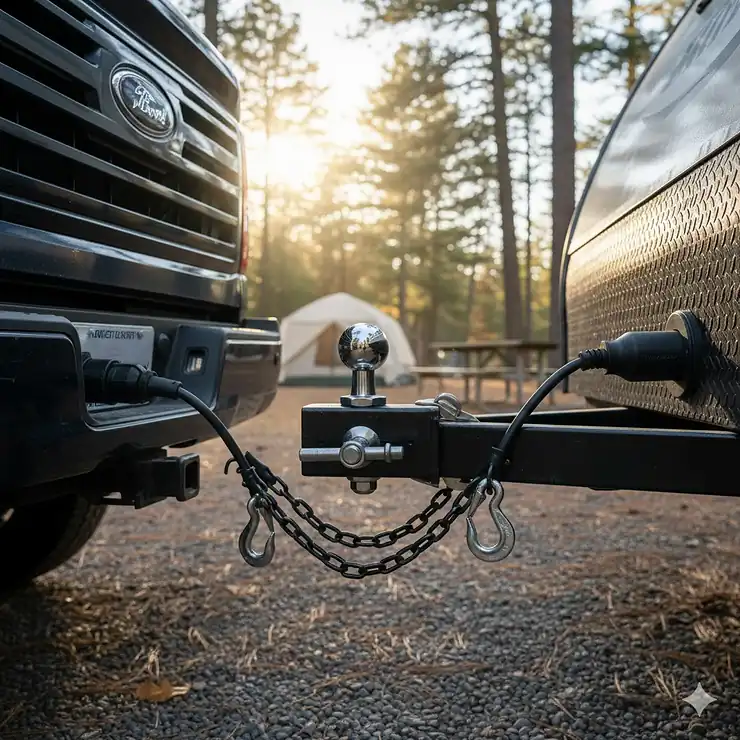
Picture this: you’re finally ready to hit the open road with your camper, dreams of mountain sunsets and lakeside mornings filling your mind. But wait—have you sorted out the most critical connection between your tow vehicle and that adventure-mobile? Choosing the right hitch for a camper isn’t just about slapping on any old metal contraption and calling it a day.
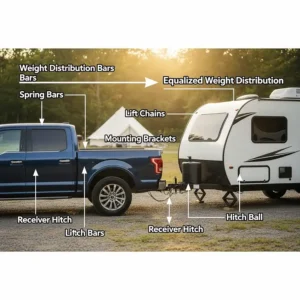
I’ve spent years helping RV enthusiasts find the perfect towing setup, and I can tell you that a quality hitch for a camper makes the difference between white-knuckle highway stress and smooth, confident cruising. Whether you’re towing a lightweight pop-up or a hefty fifth-wheel, understanding your hitch options can save you thousands in potential damage and countless headaches on the road. The right hitch for a camper distributes weight properly, prevents dangerous trailer sway, and gives you the peace of mind to actually enjoy your journey instead of worrying about what’s happening behind you.
In this comprehensive guide, we’ll explore everything from adjustable frame-mounted hitches to weight distribution systems with integrated sway control. I’ll walk you through the top 7 hitches that real campers are using in 2025, breaking down what makes each one special and which scenarios they excel in. Let’s dive in and find the perfect hitch for a camper that matches your specific towing needs!
Quick Comparison Table: Best Hitch for a Camper Options
| Product | Type | Capacity (GTW/TW) | Price Range | Best For |
|---|---|---|---|---|
| CURT 13701 | Frame-Mounted RV Hitch | 5,000 lbs / 500 lbs | $272-$300 | Mid-size campers, versatile towing |
| Stromberg Carlson CC-300 | Adjustable Accessory Hitch | Class I/II | $268-$350 | Bike racks, cargo carriers |
| Reese 49912 Pro | Weight Distribution w/ Sway Control | 8,000 lbs / 800 lbs | $450-$550 | Travel trailers, sway prevention |
| Blue Ox SwayPro BXW1500 | WD Hitch w/ Active Sway | 15,000 lbs / 1,500 lbs | $650-$800 | Heavy campers, premium control |
| CURT 13703 | Adjustable RV Hitch (72″) | 3,500 lbs / 350 lbs | $438-$480 | Wide frame RVs |
| Reese 66093 Dual Cam II | Weight Distribution System | 12,000 lbs / 1,200 lbs | $580-$700 | Full-size travel trailers |
| RV Bumper Hitch 2″ | Bumper-Mounted Receiver | 200 lbs (accessory only) | $40-$90 | Light-duty accessories |
💬 Just one click – help others make better buying decisions too! 😊
Top 7 Hitches for a Camper: Expert Analysis
1. CURT 13701 Adjustable Trailer Hitch RV Towing
The CURT 13701 sits at the top of our list for good reason—it’s the Goldilocks of camper hitches, offering just-right versatility for most RV owners. This three-piece adjustable design fits frames up to 51 inches wide with a built-in 2-inch drop that’s perfect for higher-riding motorhomes.
Key Specifications:
- Gross Trailer Weight: 5,000 lbs
- Tongue Weight: 500 lbs
- Weight Distribution Rating: 6,000 lbs GTW / 600 lbs WDTW
- Receiver Size: 2″ x 2″
- Frame Compatibility: 18″-51″ wide
What sets this hitch apart is its dual-coat finish—a rust-resistant liquid A-coat underneath a durable black powder coat that’s co-cured for exceptional protection against the elements. Every CURT hitch undergoes rigorous testing at their Detroit facility according to SAE J684 standards, ensuring you’re getting a product that won’t fail when you need it most.
Customer Feedback: RVers consistently praise the straightforward installation, with most completing the setup in under two hours using basic tools. Many note that the adjustable side plates make fitting to their specific frame width a breeze.
✅ Pros:
- Exceptional build quality with premium finishes
- Adjustable design fits various frame widths
- Compatible with weight distribution systems
❌ Cons:
- Not compatible with vertical-hanging bike racks
- Heavier than some competitors at 55 lbs
Price: $272-$300
2. Stromberg Carlson CC-300 Adjustable Accessory Hitch
For camper owners who need a reliable hitch for a camper to mount bike racks and cargo carriers rather than towing additional trailers, the Stromberg Carlson CC-300 delivers unbeatable versatility. This family-owned company has been perfecting RV products since 1959, and it shows in every detail.
Key Specifications:
- Adjustable range: 49.5″ to 76.5″
- Receiver: 2″ square
- Configuration: Bolt-on (Class I) or Weld-on (Class II)
- Material: Alloy steel with powder-coat finish
The beauty of this hitch lies in its dual installation options. Need something quick and removable? Bolt it on as a Class I hitch. Planning to use it more permanently and want that extra strength? Weld it as a Class II. This adaptability makes it an excellent choice for RVers who upgrade their setup over time.
Customer Feedback: Buyers love the flexibility of mounting to either the side wall of the frame or the horizontal wall of C-channel or I-beam configurations. The angled hardware ensures a secure fit across different frame designs.
✅ Pros:
- Flexible installation options (bolt or weld)
- Extends to accommodate wide frames
- Excellent for accessory mounting
❌ Cons:
- Not designed for towing vehicles in Class I configuration
- Requires welding for Class II strength
Price: $268-$350
3. Reese 49912 Pro Round Bar Weight Distribution Hitch
When you’re dealing with heavier travel trailers that tend to induce sway, the Reese 49912 Pro brings integrated sway control technology that works the moment you hit the road. This isn’t just another weight distribution system—it’s a complete towing solution engineered for superior ride performance.
Key Specifications:
- GTW Capacity: 8,000 lbs
- Tongue Weight: 800 lbs
- Includes: Pre-installed 2-5/16″ ball, tapered spring bars, 8.5″ drop shank
- Bracket System: No-drill clamp-on (fits up to 7″ trailer frames)
The tapered spring bars are where this hitch really shines. Unlike traditional flat bars, these provide constant weight distribution over the axles, dramatically improving ride comfort. The high-strength steel head and welded construction mean this hitch for a camper will outlast your current RV and probably the next one too.
Customer Feedback: Users report noticeable stability improvements, especially in crosswinds and when passing large trucks. The pre-installed ball saves time and eliminates torque guesswork.
✅ Pros:
- Integrated sway control reduces trailer movement
- Complete kit with all necessary hardware
- Excellent for taller modern trucks (8.5″ drop)
❌ Cons:
- Bulkier than standard hitches
- Higher price point than basic weight-carrying hitches
Price: $450-$550
4. Blue Ox SwayPro BXW1500 Weight Distribution Hitch
For serious RVers who demand the absolute best in sway prevention, the Blue Ox SwayPro BXW1500 represents the cutting edge of hitch technology. This isn’t your grandfather’s weight distribution system—it’s a sophisticated four-point design that prevents sway before it even starts.
Key Specifications:
- Maximum GTW: 15,000 lbs
- Tongue Weight: 1,500 lbs
- Receiver: 2″ standard
- Shank: 7-hole adjustable design
What makes the SwayPro revolutionary is its geometry-based sway prevention. Traditional hitches correct sway after it begins using friction. The SwayPro uses the pitch angle of the head design combined with spring steel bars to hold the trailer in line from the start. The rotating latches eliminate noise during turns and allow you to back up without removing the hitch—a huge convenience factor.
Customer Feedback: Owners rave about the noise-free operation and how confidence-inspiring the system feels, even in challenging conditions like mountain passes or heavy rain.
✅ Pros:
- Active sway prevention (not reactive friction)
- Rotating latches for easy setup and quiet operation
- Works flawlessly in all weather conditions
❌ Cons:
- Premium pricing
- Heavier than basic hitches
Price: $650-$800
5. CURT 13703 Adjustable RV Trailer Hitch (Wide Frame)
Got a beast of a motorhome with an extra-wide frame? The CURT 13703 extends the proven design of the 13701 to accommodate frames up to 72 inches wide. This is the go-to choice for larger Class A motorhomes and wide-body fifth wheels.
Key Specifications:
- Frame Compatibility: 22″-72″ wide
- GTW: 3,500 lbs
- Tongue Weight: 350 lbs
- Receiver: 2″ x 2″
While the weight capacity is lower than its smaller sibling, that’s actually appropriate for the larger RVs this hitch serves. These bigger rigs typically use the rear hitch for dinghy towing or cargo carriers rather than pulling heavy trailers.
Customer Feedback: Buyers with wide-frame RVs appreciate finally finding a hitch that fits without custom fabrication. The same quality CURT construction and finish apply here.
✅ Pros:
- Fits exceptionally wide frames (up to 72″)
- Same quality construction as other CURT models
- Perfect for large motorhomes
❌ Cons:
- Lower weight capacity than narrower models
- Higher price due to larger size
Price: $438-$480
6. Reese 66093 Dual Cam II Active Sway Control
The Reese 66093 takes a different approach to sway control with its patented Dual Cam technology. This system literally forces the trailer to stay in a straight line behind your tow vehicle, providing an active solution rather than passive resistance.
Key Specifications:
- Maximum GTW: 12,000 lbs
- Tongue Weight: 1,200 lbs
- Installation: No-drill clamp design
- Special Feature: Automatic sway control engagement
The genius of this design is how it works automatically. When you connect the spring bars, the sway control engages without any manual activation. The stronger the sway force, the harder the system works to counteract it. It’s engineering at its finest.
Customer Feedback: Users particularly appreciate how the system doesn’t interfere with A-frame-mounted items like propane tanks or battery boxes thanks to the no-U-bolt design.
✅ Pros:
- Fully automatic active sway control
- Space-saving design preserves A-frame accessibility
- Simplified hook-up process
❌ Cons:
- Premium pricing for the technology
- Requires proper initial setup for optimal performance
Price: $580-$700
7. RV Bumper Hitch Receiver 2 Inch Adapter
Sometimes you just need something simple and affordable, and that’s where a basic RV Bumper Hitch Receiver shines. This bolt-on adapter turns your 4″-4.5″ RV bumper into a standard 2″ receiver for light-duty accessories.
Key Specifications:
- Bumper Compatibility: 4″-4.5″ square bumpers
- Receiver Size: 2″ standard
- Weight Capacity: 200 lbs (accessories only)
- Installation: Clamp-on bolt design
Let’s be crystal clear—this is NOT for towing. This hitch for a camper is designed exclusively for carrying bike racks, small cargo carriers, or storage boxes. But for that purpose, it’s perfect and incredibly affordable.
Customer Feedback: Buyers love how easy it is to install without drilling or welding. The powder-coated finish holds up well to outdoor exposure.
✅ Pros:
- Extremely affordable entry point
- No-drill installation in minutes
- Adequate for bike racks and light cargo
❌ Cons:
- NOT suitable for towing any vehicles or trailers
- Limited to bumper weight capacity
Price: $40-$90
Understanding Hitch Classes: What You Need to Know
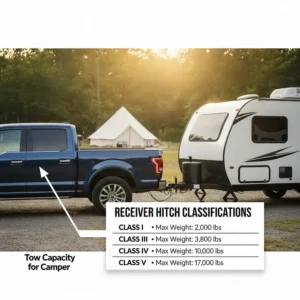
Before you buy a hitch for a camper, understanding hitch classifications will save you from expensive mistakes. The Society of Automotive Engineers establishes these standards, and they exist for your safety.
Class I Hitches
Capacity: Up to 2,000 lbs GTW / 200 lbs TW
Receiver: 1-1/4″
Typical Vehicles: Compact cars, small crossovers
Think of Class I as the bicycle rack and small cargo carrier class. You’ll find these on vehicles where towing isn’t the primary function. They’re perfect for lightweight utility but won’t handle actual camping trailers.
Class II Hitches
Capacity: Up to 3,500 lbs GTW / 350 lbs TW
Receiver: 1-1/4″ (sometimes 2″)
Typical Vehicles: Sedans, minivans, small SUVs
Class II steps up the game enough to handle small pop-up campers and teardrop trailers. If you’re towing a jet ski or a small boat, this is your territory.
Class III Hitches
Capacity: Up to 8,000 lbs GTW / 800 lbs TW
Receiver: 2″
Typical Vehicles: SUVs, pickup trucks, vans
Here’s where most camper owners land. Class III hitches can handle medium-sized travel trailers and, when paired with weight distribution, can reach up to 12,000 lbs capacity. This is the sweet spot for weekend warriors and full-time adventurers alike.
Class IV Hitches
Capacity: Up to 10,000 lbs GTW / 1,000 lbs TW (14,000 lbs with WD)
Receiver: 2″ or 2-1/2″
Typical Vehicles: Heavy-duty trucks, large SUVs
When you’re pulling a full-size travel trailer or a hefty fifth wheel, Class IV delivers the muscle you need. These hitches mean business and come with price tags to match their capabilities.
Class V Hitches
Capacity: Up to 20,000 lbs GTW / 2,700 lbs TW
Receiver: 2-1/2″ (sometimes 3″)
Typical Vehicles: Commercial trucks, heavy-duty pickups
This is the big leagues—commercial trailers, livestock haulers, and the largest toy haulers. Unless you’re running a commercial operation or have an exceptionally heavy RV setup, you probably won’t need Class V.
Frame-Mounted vs Bumper-Mounted: Which Hitch for a Camper is Right?
The mounting style dramatically affects your hitch’s performance and safety. Let’s break down the key differences.
Frame-Mounted Hitches
Advantages:
- Superior strength and weight capacity
- Distributes load across vehicle’s structural members
- Required for weight distribution systems
- Better for dinghy towing and heavier applications
Disadvantages:
- More complex installation
- Higher cost
- May require professional installation
Frame-mounted hitches bolt directly to your RV’s frame rails, creating a rock-solid connection that can handle serious weight. Products like the CURT 13701 and Stromberg Carlson CC-300 use this approach. The installation takes longer, but you’re building a foundation that will last decades.
Bumper-Mounted Hitches
Advantages:
- Quick and easy installation
- Lower cost
- Perfect for accessories like bike racks
- Can be removed easily if needed
Disadvantages:
- Limited weight capacity (often 200-500 lbs max)
- Not suitable for towing vehicles
- Dependent on bumper strength
RV bumpers typically aren’t designed for heavy towing loads. They’re more about protecting your investment from minor impacts. A bumper-mounted receiver works beautifully for carrying bikes to your campsite but should never be your choice for towing that second vehicle or trailer.
Weight Distribution Systems: The Secret to Smooth Towing
Ever wondered why some campers wobble down the highway while others glide smoothly? The answer often comes down to weight distribution.
How Weight Distribution Works
A standard hitch carries all the tongue weight at the hitch ball. This creates a seesaw effect—the rear of your tow vehicle squats down while the front lifts up. Your headlights point at the stars, steering gets light and wandering, and your trailer becomes a bucking bronco in crosswinds.
Weight distribution hitches use spring bars to transfer load from the hitch ball to all axles of both the tow vehicle and trailer. Suddenly, your truck sits level, steering feels confident, and that trailer tracks behind you like it’s on rails.
Do You Need Weight Distribution?
You NEED weight distribution if:
- Your trailer weighs over 5,000 lbs
- Your rear end sags noticeably when hitched
- Your headlights point upward when loaded
- You experience steering wander or float
- Your trailer starts swaying in wind or when passed
You might skip it if:
- Towing a very light pop-up or teardrop (under 2,000 lbs)
- Your truck has a towing prep package and trailer is well under capacity
- Only using the hitch for cargo carriers or bike racks
Products like the Reese 49912 Pro and Blue Ox SwayPro don’t just distribute weight—they actively prevent the dangerous swaying that’s caused thousands of accidents. That investment could literally save your life.
Sway Control: Your Insurance Against Highway Disasters
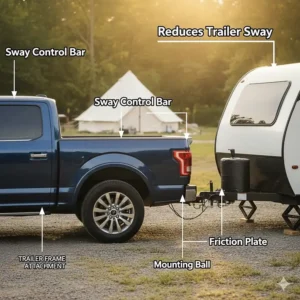
Trailer sway happens when external forces (wind, passing trucks, road irregularities) cause your trailer to oscillate side-to-side. Left unchecked, it can quickly escalate into a jackknife situation that totals your rig and endangers everyone around you.
Types of Sway Control
Friction Sway Control:
Uses friction pads that resist trailer movement. Think of it like adding drag to slow down the swaying motion. It’s affordable and works, but only kicks in after sway has already started.
Active Sway Control (Dual Cam):
The Reese Dual Cam II system uses integrated cams that literally force the trailer to stay straight. The harder the trailer tries to sway, the more resistance it encounters. This is proactive rather than reactive.
Geometry-Based Prevention (Blue Ox SwayPro):
The most sophisticated approach uses the tension and geometry of a four-point attachment system to prevent sway from ever starting. The pitch angle of the hitch head works with spring bars to constantly center the trailer.
When Do You Absolutely Need Sway Control?
- Travel trailers over 20 feet
- Camping in areas with strong crosswinds
- Highway driving at 60+ mph
- If you’ve ever experienced scary sway before
- Towing with smaller vehicles near their capacity limit
Remember: sway control isn’t optional equipment when lives are at stake. It’s essential safety gear.
Installation Essentials: DIY or Professional?
Installing a hitch for a camper ranges from “Saturday afternoon project” to “definitely call the experts.” Here’s how to decide.
DIY-Friendly Installations
Good candidates for DIY:
- Bumper-mounted receivers (like the basic RV Bumper Hitch)
- Well-documented hitches with pre-drilled holes (CURT models excel here)
- Bolt-on frame-mounted hitches with clear instructions
Tools you’ll need:
- Socket wrench set (including deep sockets)
- Torque wrench (critical for proper fastener tension)
- Jack stands or ramps for access
- Drill with metal bits (sometimes)
- Wire brush for cleaning mounting surfaces
Most CURT and Stromberg Carlson hitches include detailed instructions and all necessary hardware. If you’re comfortable doing your own oil changes and basic maintenance, you can probably handle these installations. Just take your time, follow torque specifications exactly, and don’t skip the thread locker on critical bolts.
When to Call the Pros
Definitely get professional help for:
- Welded installations (Stromberg CC-300 in Class II mode)
- Custom fabrication for unusual RV configurations
- Weight distribution system setup and adjustment
- If you lack proper tools or safe working space
- Whenever you’re uncertain about any step
A professional installation typically costs $150-$400 depending on complexity. Compare that to the potential damage from an improper installation that fails on the highway, and it’s cheap insurance.
Critical Installation Points
Never compromise on:
- Torque specifications – Under-torqued bolts work loose; over-torqued ones can strip or snap
- Grade 8 hardware – Use only the bolts supplied or specified by the manufacturer
- Frame cleanliness – Paint, rust, and debris prevent solid metal-to-metal contact
- Wiring integration – Improper electrical connections cause brake controller and lighting failures
Compatibility Checklist: Will This Hitch Work with Your Setup?
Before clicking “buy,” run through this essential compatibility checklist for your hitch for a camper.
Frame Measurements
What to measure:
- Inside width between frame rails (at multiple points—frames aren’t always parallel)
- Frame thickness and type (C-channel, I-beam, square tube)
- Distance from rear bumper to frame mounting location
- Ground clearance needs
Products like the CURT 13701 (18″-51″) and CURT 13703 (22″-72″) cover different frame width ranges. Measure twice, order once.
Weight Calculations
You must know:
- GVWR (Gross Vehicle Weight Rating) of your trailer
- Actual loaded weight (GVWR is maximum, not actual)
- Tongue weight (should be 10-15% of trailer weight)
- Tow vehicle capacity (check your owner’s manual)
Your hitch for a camper is only as strong as your weakest component. If your truck can tow 8,000 lbs but your hitch is rated for 5,000 lbs, you’re limited to 5,000 lbs. Period.
Receiver Size Matching
- Standard sizes: 1-1/4″, 2″, 2-1/2″
- Ball mounts must match receiver size
- Adapters available but reduce capacity
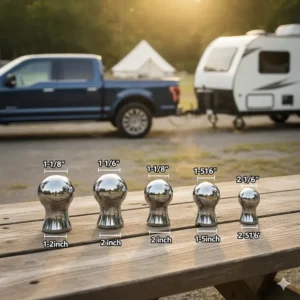
- Verify ball size required by trailer coupler (1-7/8″, 2″, 2-5/16″ most common)
Special Considerations for Fifth Wheels
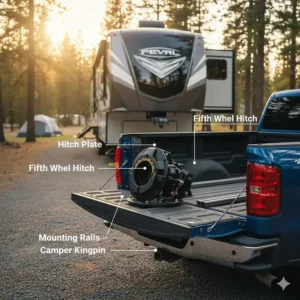
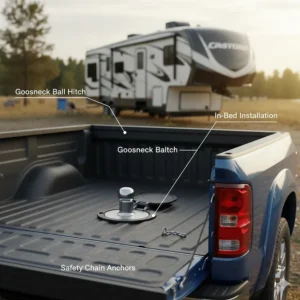
Fifth wheel hitches are a completely different animal. They mount in the truck bed over the rear axle and require specialized installation. If you’re towing a fifth wheel, you need a fifth wheel hitch—standard receiver hitches won’t cut it.
Maintenance Tips: Making Your Hitch Last Forever
A quality hitch for a camper should outlast your RV, but only if you maintain it properly. Here’s how to protect your investment.
Regular Inspection Schedule
Before every trip:
- Check all bolts for tightness (use torque wrench quarterly)
- Inspect welds for cracks or stress fractures
- Verify safety chains aren’t damaged
- Test electrical connections
Monthly (during camping season):
- Clean mud, road salt, and debris from all surfaces
- Lubricate ball mount and pin mechanisms
- Check for rust spots and touch up as needed
- Grease spring bar pivot points (weight distribution systems)
Annually:
- Complete tear-down inspection of all components
- Replace any questionable hardware
- Professional inspection of welds and stress points
- Re-torque all fasteners to specification
Lubrication Points
Ball mount: Light coating of high-quality grease prevents rust and allows smooth coupler attachment. Wipe excess to avoid attracting dirt.
Spring bars and pivots: Weight distribution systems need regular lubrication at pivot points. Use marine-grade grease that won’t wash out.
Receiver tube: A thin coat of anti-seize compound prevents the shank from corroding into the receiver—you want to be able to remove it someday!
Rust Prevention
Even powder-coated hitches need protection:
- Wash after winter driving to remove road salt
- Touch up any scratches or chips immediately with matching paint
- Apply rust-preventive spray to hidden surfaces annually
- Store removable components indoors during off-season
Storage Best Practices
When not in use:
- Remove ball mounts and store in garage/covered area
- Cover receiver opening to prevent water intrusion
- Store weight distribution components horizontally to prevent warping
- Keep all components in dry environment to prevent rust
Common Mistakes That Cost RVers Thousands
Learn from others’ expensive errors. Here are the mistakes I see repeatedly that you must avoid.
Mistake #1: Choosing Based on Price Alone
That $89 “universal fit” hitch might seem like a steal until it bends on your first mountain pass or starts rattling apart after 500 miles. Quality hitches like CURT and Reese cost more because they’re precision-manufactured from high-grade materials and tested rigorously. The SAE J684 testing standard exists because hitch failures kill people.
The fix: Calculate cost-per-year of use. A $300 hitch lasting 20 years costs $15/year. That $89 hitch lasting 2 years costs $44.50/year—plus the risk.
Mistake #2: Ignoring Tongue Weight
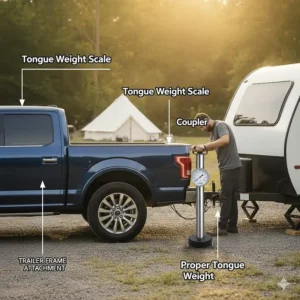
So many RVers know their trailer’s total weight but have no clue about tongue weight. Your hitch’s tongue weight rating is often the limiting factor, not GTW. A 6,000-lb trailer with 900 lbs tongue weight exceeds most Class III hitches (rated 500-800 lbs TW) even though it’s well under the GTW limit.
The fix: Actually weigh your loaded tongue using a specialized scale. Don’t guess.
Mistake #3: Skipping Weight Distribution When Needed
“It towed fine without weight distribution for 200 miles!” Yeah, until it didn’t. That death wobble can appear suddenly when conditions change—crosswinds, rain, worn tires. Weight distribution isn’t about surviving calm conditions; it’s about staying safe when things go wrong.
The fix: If your rear sags more than 2 inches when hitched, you need weight distribution. No exceptions.
Mistake #4: Incorrect Ball Height
A ball too high or too low creates dangerous handling. Your trailer should sit level (measure from ground to a reference point on the side). An unlevel trailer puts improper weight on the ball, increases sway, and stresses the hitch components in ways they weren’t designed for.
The fix: Use an adjustable ball mount and take time to get it perfectly level. This is easier with systems like the Blue Ox SwayPro that include multiple adjustment holes.
Mistake #5: Never Checking Torque
Those critical bolts loosen over time from vibration and thermal cycling. I’ve seen hitches with half their bolts finger-tight because owners installed it once and never checked again.
The fix: Keep a torque wrench in your RV toolbox. Check critical fasteners quarterly and always before long trips.
Budget Planning: What to Expect for Different Setups
Let’s talk real numbers for complete hitch setups at different price points.
Budget Setup ($300-$500 Total)
Components:
- Basic Class III receiver hitch ($200-$300)
- Standard ball mount ($40-$60)
- Hitch ball ($15-$25)
- Safety chains and clips ($30-$50)
Good for: Light-duty occasional campers, pop-ups under 3,000 lbs, cargo carriers
Example: Basic RV bumper receiver + simple ball mount for weekend trips with a small teardrop trailer.
Mid-Range Setup ($500-$1,000 Total)
Components:
- Quality adjustable hitch like CURT 13701 ($275-$300)
- Adjustable ball mount ($80-$120)
- Premium hitch ball ($25-$40)
- Basic weight distribution kit ($200-$350)
Good for: Regular campers with travel trailers 3,000-6,000 lbs, dinghy towing
Example: CURT 13701 + simple weight distribution for a 23-foot travel trailer used most weekends.
Premium Setup ($1,000-$1,500 Total)
Components:
- Top-tier adjustable hitch ($300-$450)
- Reese Pro or Blue Ox weight distribution with integrated sway control ($450-$800)
- Premium accessories and backup systems ($250-$300)
Good for: Full-time RVers, heavy trailers 6,000-12,000 lbs, mountain travel
Example: CURT 13704 + Blue Ox SwayPro for a 28-foot travel trailer with full-time living.
Professional/Commercial Setup ($1,500-$3,000+ Total)
Components:
- Heavy-duty Class IV/V hitch ($500-$800)
- Advanced weight distribution with dual sway control ($800-$1,200)
- Professional installation and calibration ($200-$400)
- Monitoring systems and upgrades ($200-$600)
Good for: Large fifth wheels (via gooseneck adapter), commercial towing, extreme conditions
Example: Complete professional setup for towing a 35-foot fifth wheel across the country.
Advanced Features Worth Considering
Modern hitches offer sophisticated features that weren’t available even five years ago. Here’s what’s worth the upgrade.
Integrated Sway Control
Traditional sway control used separate friction devices clamped to the hitch. Modern systems like the Reese Dual Cam II and Blue Ox SwayPro build sway prevention directly into the hitch head geometry. This means:
- No extra components to attach/detach
- Works automatically from the moment you connect
- More effective than add-on friction systems
- Quieter operation with less maintenance
Adjustable Shank Designs
Multiple drop/rise positions let you fine-tune trailer level for different trailers or when your tow vehicle and trailer change. The Blue Ox SwayPro BXW1500 offers 7-hole adjustment for infinite positioning within a 9-inch range. This beats buying multiple ball mounts for different scenarios.
Quick-Connect Systems
Rotating latches (Blue Ox) and snap-up brackets (Reese) transform hookup from a 15-minute wrestling match into a 3-minute procedure. Your back will thank you, especially if you’re hooking up multiple times per trip.
Built-In Scales
Some premium weight distribution hitches now include integrated scales that show tongue weight in real-time. While not common yet, this feature eliminates the guesswork of proper loading. Expect to see this become standard on high-end systems within 2-3 years.
Noise-Reduction Technology
Nothing ruins a peaceful drive like squeaking, rattling hitch components. Modern premium hitches use:
- Rubber isolators at contact points
- Greaseable bearings instead of metal-on-metal friction
- Precision manufacturing for tighter tolerances
- Rotating components that eliminate binding
Seasonal Considerations for Your Hitch for a Camper
Your hitch faces different challenges across seasons. Here’s how to adapt.
Summer Camping Season
Challenges:
- UV degradation of coatings
- Thermal expansion affecting torque
- Increased road grime and dust
Actions:
- UV-protectant spray on exposed components
- Re-check torque in extreme heat
- More frequent cleaning
- Store removable components in shade when not in use
Winter Storage and Use
Challenges:
- Road salt accelerating corrosion
- Freeze-thaw cycles
- Rubber components becoming brittle
- Grease thickening/hardening
Actions:
- Wash thoroughly after every salted-road exposure
- Apply extra anti-corrosion protection
- Use cold-weather lubricants
- Store indoors if possible
- Exercise moving parts monthly to prevent freezing
Spring Prep
Before your first trip of the season:
- Complete visual inspection for winter damage
- Replace any cracked or degraded rubber components
- Fresh grease application to all pivot points
- Re-torque all fasteners
- Function test all latches and mechanisms
Fall Maintenance
Preparing for storage:
- Deep clean all components
- Touch up any paint chips or scratches
- Heavy coat of protective spray
- Ensure complete dryness before storage
- Store in climate-controlled environment if possible
Legal and Safety Compliance
Operating a hitch for a camper isn’t just about mechanical connection—there are legal requirements you must meet.
Federal Requirements
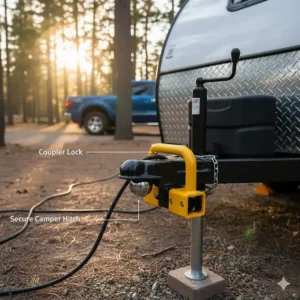
Safety chains: Every trailer connection must include properly rated safety chains crossed under the tongue. They’re not optional or decorative—they’re required by federal law and could save your life.
Brake controllers: Most states require electric trailer brakes for trailers over 3,000 lbs. Your hitch must integrate properly with the brake controller wiring.
Lighting: All trailer lights must function and be properly connected. The hitch’s 4-pin or 7-pin connector must provide power to:
- Running lights
- Brake lights
- Turn signals
- License plate light
State-Specific Regulations
Requirements vary by state, but common rules include:
- Maximum hitch height above ground (usually 30″ to coupling point)
- Minimum ground clearance for ball mount
- Safety chain requirements (strength rating and attachment method)
- Speed limits for different trailer classes
Check your state’s DMV website or FMCSA regulations for specific requirements before your first trip.
Insurance Implications
Your auto insurance may not automatically cover trailer towing. Check your policy for:
- Trailer physical damage coverage
- Liability limits when towing
- Specific hitch equipment requirements
- Exclusions for commercial use
An improper hitch installation or failure to meet weight ratings can void your coverage in the event of an accident. Document your installation and keep receipts proving proper equipment ratings.
Expert Tips from Professional RV Technicians
I asked veteran RV techs what they wish every camper owner knew about hitches. Here’s their wisdom.
“Measure Everything Twice”
Jake, 20-year RV technician: “You’d be amazed how many people buy a hitch based on guessing their frame width or trailer weight. We had a guy come in with a brand-new $400 weight distribution system that didn’t fit his frame. Always measure, always weigh, always verify before ordering.”
“Upgrade Your Safety Chains”
Maria, mobile RV service: “Factory safety chains are often the bare minimum. For $50, you can get properly rated, coated chains that’ll outlast your RV. Same with the hitch pins—spend $20 on a locking pin instead of using that bent bolt you found in the garage.”
“Break-In Period Matters”
Tom, dealership service manager: “A new weight distribution system needs a break-in period. The spring bars seat in, connections settle, bolts settle. We recommend re-torquing all fasteners after the first 50 miles, then again at 500 miles. Most failures happen because people install it and never check again.”
“Invest in the Right Tools”
Sarah, independent tech: “A $40 torque wrench will save you from thousands in damage. Same with a good tongue weight scale—knowing your actual weight instead of guessing prevents so many problems. These aren’t optional tools for serious RVers.”
“Document Your Setup”
Mike, mobile RV inspector: “Take pictures of your hitch installation showing bolt positions, settings, and measurements. When you change trailers or vehicles, you’ll have a reference. I’ve seen people tear apart perfectly good setups because they forgot how everything was configured.”
Troubleshooting Common Hitch Problems
Even with proper installation, issues can arise. Here’s how to diagnose and fix them.
Problem: Excessive Swaying
Possible causes:
- Insufficient tongue weight (load too far back)
- Worn tires on trailer or tow vehicle
- Weight distribution not set up correctly
- Trailer loaded unevenly side-to-side
Solutions:
- Redistribute cargo forward (aim for 60% weight forward of axles)
- Check/replace worn tires
- Re-level and adjust weight distribution system
- Verify trailer is loaded evenly left-to-right
Problem: Rear Sagging Despite Weight Distribution
Possible causes:
- Wrong spring bar rating (too light)
- Bars not connected at correct tension
- Worn suspension on tow vehicle
- Overloaded trailer exceeding hitch capacity
Solutions:
- Upgrade to heavier spring bars
- Adjust chain links to increase bar tension
- Consider suspension enhancement (air bags, heavy-duty shocks)
- Verify total weight is within all component ratings
Problem: Rattling or Clunking Noises
Possible causes:
- Loose hitch pin
- Worn receiver tube
- Ball mount with too much play
- Loose bolts on hitch mounting
Solutions:
- Replace hitch pin with proper locking pin
- Install receiver tube shim to reduce play
- Upgrade to precision-fit ball mount
- Re-torque all mounting bolts
Problem: Difficulty Connecting Weight Distribution Bars
Possible causes:
- Trailer not level with tow vehicle
- Wrong bar length for application
- Insufficient jack height
- Bars binding in head
Solutions:
- Adjust ball height for level connection
- Verify correct bar length was ordered
- Use higher-capacity tongue jack
- Clean and lubricate pivot points
Upgrading Your Existing Setup
Maybe you already have a hitch but want to enhance your system. Here’s how to upgrade intelligently.
When to Upgrade vs Replace
Upgrade your existing hitch if:
- Current hitch has adequate weight capacity
- Structure and welds are sound
- Just need to add sway control or weight distribution
- Want to improve accessories (better ball mount, locks, etc.)
Replace completely if:
- Nearing or exceeding weight ratings
- Visible rust, cracks, or damage
- Switching to significantly heavier trailer
- Current design incompatible with needed features
Compatible Upgrades for Common Hitches
CURT 13701/13703/13704 owners:
- Can add any standard 2″ receiver weight distribution system
- Compatible with all major sway control devices
- Upgraded ball mounts with built-in scales available
- Locking hitch pins for security
Stromberg Carlson CC-300 owners:
- Limited to Class I capacity if bolted
- Can be welded for Class II strength upgrade
- Compatible with standard 2″ accessories
- Difficult to add weight distribution
Reese/Blue Ox system owners:
- Can upgrade spring bar ratings without replacing head
- Add-on sway control devices available
- Adjustable shanks provide more versatility
- Wireless weight monitoring systems compatible
Sequential Upgrade Path
Year 1: Basic hitch installation Year 2: Add quality ball mount and safety chains
Year 3: Install weight distribution system Year 4: Upgrade to integrated sway control Year 5: Add monitoring/scale systems
This spreads costs over time while progressively improving safety and capability.
FAQ: Your Hitch for a Camper Questions Answered
❓ What size ball do I need for my hitch for a camper?
❓ Can I install a hitch for a camper myself or do I need professional help?
❓ How do I know if I need weight distribution for my camper?
❓ What's the difference between a bumper-mounted and frame-mounted hitch for a camper?
❓ How often should I inspect and maintain my hitch for a camper?
Conclusion: Finding Your Perfect Match
Choosing the right hitch for a camper transforms your RV experience from white-knuckle anxiety to confident cruising. We’ve covered everything from basic bumper receivers to sophisticated weight distribution systems with active sway control, giving you the knowledge to make an informed decision.
Remember the key takeaways: measure your frame accurately, know your actual weights (not just estimates), select a hitch class that exceeds your maximum needs, and don’t skip weight distribution or sway control if you need them. The $200-$800 you invest in a quality hitch setup will pay for itself through reduced wear on your vehicle, improved fuel economy from better aerodynamics, and most importantly, peace of mind knowing your family is safe.
Whether you choose the versatile CURT 13701 for mid-size applications, the innovative Blue Ox SwayPro for ultimate sway prevention, or the budget-friendly RV bumper receiver for light accessories, you’re now equipped to make the right choice. Your perfect hitch for a camper is out there—it’s just a matter of matching your specific needs to the right product.
✨ Don’t Miss These Exclusive Deals!
🔍 Take your camping adventures to the next level with these carefully selected hitches. Click on any highlighted product above to check current pricing and availability. These tools will help you create authentic experiences your family will remember forever!
Safe travels, fellow adventurers. May your hitch hold strong and your adventures run long!
Recommended for You
- 7 Best Camper Ceiling Fans for 2025: Cool Your Rig Right
- 7 Best Camp Trunks That’ll Transform Summer Packing 2025
- 7 Best Tent Heaters for Camping 2025 | Expert Safety Tips
Disclaimer: This article contains affiliate links. If you purchase products through these links, we may earn a small commission at no additional cost to you.
✨ Found this helpful? Share it with your friends! 💬🤗
