In This Article
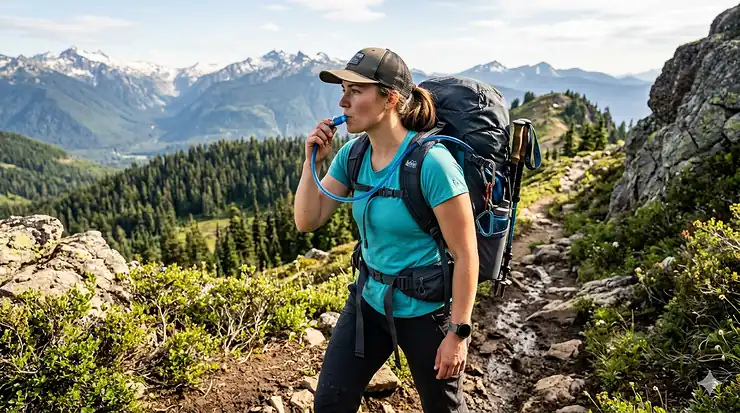
Picture this: you’re halfway up a challenging mountain trail, sweat dripping down your face, and your throat feels like sandpaper. You reach behind for your water bottle—except it’s buried somewhere in your pack, and stopping means losing your rhythm and momentum. Sound familiar?
Here’s the reality most hikers face: research from Arizona State University shows that roughly 25% of heat-related illness cases result from inadequate fluid intake rather than heat exposure alone. Even worse, most hikers don’t bring enough fluid to compensate for their sweat loss during the hike. That’s where a quality hydration bladder for hiking changes everything.
Unlike fumbling with bottles, a proper water bladder hiking system lets you sip continuously without breaking stride. The difference between staying hydrated and becoming another dehydration statistic often comes down to convenience—and nothing beats having water literally at your lips through a simple tube.
After testing dozens of hydration reservoir backpacking systems across scorching desert trails and frigid mountain passes, I’ve narrowed down the absolute best options for 2026. Whether you’re a casual day hiker or a hardcore backpacker crushing 20-mile days, I’ll show you exactly which hydration bladder for hiking delivers the performance, durability, and features you actually need.
This isn’t just another generic gear list. Every product here has been tested in real conditions, evaluated for Camelbak reservoir review-level scrutiny, and compared across critical factors like bite valve design, wide mouth opening functionality, and antimicrobial reservoir technology. Let’s find your perfect hydration solution.
Quick Comparison Table
| Product | Capacity | Weight | Price Range | Best For | Key Feature |
|---|---|---|---|---|---|
| CamelBak Crux | 1.5-3L | 7 oz | $32-42 | All-around use | 20% more water per sip |
| Osprey Hydraulics | 2-3L | 7.4 oz | $50 | Structured support | Magnetic bite valve clip |
| Platypus Big Zip EVO | 1.5-3L | 6 oz | $45-55 | Fast flow | 50% faster than standard |
| HydraPak Contour | 1.5-3L | 5.4 oz | $39-45 | Ultralight | Fully reversible for cleaning |
| Gregory 3D Hydro | 2-3L | 7.4 oz | $48-55 | Quick drying | Dries like a bottle |
| Source Widepac | 2-3L | 6.5 oz | $40-48 | Taste-free | Glass-Like technology |
| CHERAINTI | 1.5-2L | 5 oz | $15-20 | Budget-friendly | Dust cover included |
💬 Just one click – help others make better buying decisions too! 😊
Top 7 Hydration Bladder for Hiking: Expert Analysis
1. CamelBak Crux Reservoir – Best Overall Performance
When you’re talking about hydration bladder for hiking, CamelBak Crux has set the standard that everyone else chases. This isn’t marketing hype—it’s engineering that actually works.
Key Specifications:
- Capacity: 1.5L, 2L, or 3L options
- Weight: 7 ounces (2L model)
- Flow rate: 20% more water per sip
- BPA-free with HydroGuard antimicrobial technology
The CamelBak Quick Link system is brilliantly simple: disconnect your tube at the top of the bladder instead of fumbling around inside your pack. Fill it, snap it back, done. The ergonomic handle makes one-handed filling actually possible, even when you’re tired and your hands are cold.
What really separates this from cheaper options? The Big Bite valve delivers that advertised 20% increase in flow—you’re not sucking desperately for a trickle. The on/off lever prevents leaks without adding bulk or complexity.
Testing across various conditions confirmed the Crux maintains reliable performance, though some users report a slight plastic taste initially that fades after a few cleaning cycles.
✅ Pros:
- Industry-leading flow rate
- Leak-proof Quick Link disconnect
- Lifetime warranty coverage
❌ Cons:
- Initial plastic taste reported
- Slightly heavier than ultralight options
Price: $32-42 depending on capacity Customer Rating: 4.2/5 stars (700+ reviews on Amazon)
2. Osprey Hydraulics Reservoir – Best for Structured Packing
The Osprey Hydraulics tackles a problem most bladders ignore: how do you stuff a full reservoir into an already-packed backpack? The rigid backer plate is the answer.
Key Specifications:
- Capacity: 2L or 3L
- Weight: 7.4 ounces (2L)
- Features: Slide-Seal opening, magnetic sternum strap clip
- Antimicrobial treatment
That backer plate isn’t just structural support—it’s the difference between wrestling a floppy water balloon into your pack versus sliding in something that holds its shape. The center baffle keeps water distributed evenly, so you’re not dealing with a sloshing bulge on one side.
The Slide-Seal opening requires only a quarter turn to open fully. Wide enough to fit your entire hand inside for cleaning, which matters more than you’d think after a week on the trail. Quick-disconnect at the reservoir means refilling doesn’t require threading tubes through your pack straps.
Field testing confirms the Hydrapak partnership delivers excellent flow rate and reliable self-sealing, though the magnetic clip on the bite valve can attract trail dust in sandy environments.
✅ Pros:
- Rigid structure for easy pack loading
- Wide Slide-Seal opening
- Magnetic bite valve management
❌ Cons:
- Heavier than minimalist options
- Magnet attracts fine sand/dust
Price: $50 for 2L model Customer Rating: 4.3/5 stars (500+ reviews)
3. Platypus Big Zip EVO – Best Flow Rate
If you’ve ever felt like you’re working too hard just to get a drink, the Platypus Big Zip EVO will feel revolutionary. The wide mouth opening and HyFLO bite valve design delivers 50% faster flow than standard valves.
Key Specifications:
- Capacity: 1.5L, 2L, or 3L
- Weight: 6 ounces (2L)
- Tube diameter: 5/16-inch (larger than standard 1/4-inch)
- Silver-ion antimicrobial protection
That flow difference is immediately noticeable. Bite, drink, done—no prolonged sucking required. The self-sealing HyFLO valve means you can squeeze water out for your dog’s bowl or filling a pot at camp.
The quick-disconnect sits high on the bladder, making it accessible without digging into your pack. In winter conditions, this placement lets you disconnect a frozen tube and warm it under your jacket without removing the entire system.
Some user reports mention leakage issues at connection points after extended use, though Platypus stands behind their products with responsive customer service. The embedded silver-ion technology genuinely prevents that funky smell that develops in untreated bladders.
✅ Pros:
- Exceptional 50% faster flow rate
- True taste-free water storage
- High-mount quick disconnect
❌ Cons:
- Some durability concerns at connections
- Premium pricing
Price: $45-55 depending on size Customer Rating: 4.0/5 stars (mixed reviews on durability)
4. HydraPak Contour – Best Lightweight Design
At just 5.4 ounces for a 3-liter capacity, the HydraPak Contour is the choice when every ounce counts. But being light doesn’t mean sacrificing features—this is one of the most cleverly designed hydration reservoir backpacking options available.
Key Specifications:
- Capacity: 1.5L, 2L, or 3L
- Weight: 5.4 oz (3L model)
- Features: Fully reversible, dishwasher safe
- Shape-Loc baffles for stability
The killer feature? It flips completely inside out. Cleaning is actually easy instead of that awkward bottle-brush struggle. Dry it in an hour instead of hoping moisture doesn’t breed something nasty. Top-rack dishwasher safe means true deep cleaning without manual scrubbing.
The Plug-N-Play connector system uses twist-lock rather than push-fit, which feels more secure when you’re bouncing down a technical descent. The Comet bite valve has an integrated shutoff switch—flip it, toss your pack around, zero leaks.
Testing confirms this is one of the easiest bladders to maintain and clean regularly, though the thinner construction means treating it gently pays off long-term.
✅ Pros:
- Ultralight at 5.4 ounces
- Fully reversible for easy cleaning
- Dishwasher safe
❌ Cons:
- Thinner material requires careful handling
- Less structure when filling
Price: $39-45 Customer Rating: 4.5/5 stars (highly rated for convenience)
5. Gregory 3D Hydro – Best for Quick Drying
Ever had to pack a damp hydration bladder because it wouldn’t dry overnight? The Gregory 3D Hydro solves that frustration with a soft-molded 3D design that actually dries like a water bottle instead of staying perpetually moist.
Key Specifications:
- Capacity: 2L or 3L
- Weight: 7.4 ounces (3L)
- Design: 3D QuickDry technology
- SpeedClip mounting system for Gregory packs
The secret is the self-supporting structure. When hung open, the top and bottom layers don’t contact each other, allowing air circulation throughout. What takes other bladders 24+ hours to dry happens in a few hours with the 3D Hydro.
The rubberized fill port and crescent handle design make filling genuinely easy. The magnetic DryLock bite valve clips to your sternum strap magnet (included), keeping the tube exactly where you want it. The inline quick-disconnect means refilling at a stream doesn’t require removing anything from your shoulder harness.
Field testing across multiple conditions confirmed excellent durability and leak-free performance, though the screw-top opening is narrower than some competitors, making interior scrubbing slightly more challenging.
✅ Pros:
- Dramatically faster drying time
- Excellent structural integrity
- SpeedClip system for Gregory packs
❌ Cons:
- Heavier than ultralight options
- Narrower opening for cleaning
Price: $48-55 Customer Rating: 4.4/5 stars (praised for durability)
6. Source Widepac – Best Taste-Free Experience
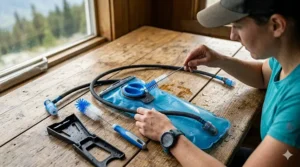
If you’ve ever noticed that plasticky taste even in “BPA-free” bladders, the Source Widepac with Glass-Like technology will surprise you. The co-extruded polyethylene film genuinely delivers water that tastes like water.
Key Specifications:
- Capacity: 2L or 3L
- Weight: 6.5 ounces
- Features: Wideslide opening, Helix bite valve
- Antimicrobial treatment
The patented Wideslide opening is the widest you’ll find—filling is effortless, and cleaning access is unmatched. Ice cubes drop right in from a refrigerator dispenser. The Helix bite valve delivers full flow with just a soft bite, and the integrated shutoff mechanism prevents accidental leaking.
The Source antimicrobial agent effectively prevents bacterial growth, keeping water fresh for multi-day trips. The three-layer polyethylene construction with Glass-Like technology creates an ultra-smooth interior surface that resists taste transfer and makes cleaning genuinely simple.
✅ Pros:
- Exceptional taste-free performance
- Widest opening available
- Durable three-layer construction
❌ Cons:
- Mid-range weight
- Less common than major brands
Price: $40-48 Customer Rating: 4.3/5 stars (praised for taste and durability)
7. CHERAINTI Hydration Bladder – Best Budget Option
Not everyone needs premium features, and that’s where the CHERAINTI delivers impressive value. At $15-20, this is the hydration bladder for hiking when you want hands-free hydration without the premium price tag.
Key Specifications:
- Capacity: 1.5L or 2L
- Weight: ~5 ounces
- Features: Bite valve dust cover, wide opening
- BPA-free food-grade material
The large 4-inch screw-on cap provides easy filling and cleaning access. Double-sealing technology improves durability over single-seal budget options. The included dust cover for the bite valve is genuinely useful on dusty or muddy trails—a feature some premium bladders skip.
Testing confirms decent performance for casual use, though some users note mild plastic taste compared to premium options. The lower profile fits various backpack shapes easily.
Yes, there are compromises. The materials aren’t as refined, flow rate is adequate rather than exceptional, and long-term durability is unproven. But for weekend warriors, gym users, or anyone getting started with hydration systems, this delivers solid functionality at a fraction of premium pricing.
✅ Pros:
- Extremely affordable pricing
- Bite valve dust cover included
- Compatible with most packs
❌ Cons:
- Some plastic taste reported
- Less refined than premium options
Price: $15-20 Customer Rating: 4.0/5 stars (excellent value for price)
What Is a Hydration Bladder for Hiking?
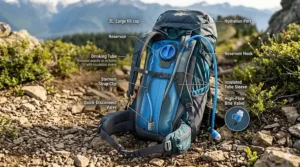
A hydration bladder for hiking is a flexible water reservoir that fits inside your backpack’s hydration sleeve, connected to a drinking tube that routes over your shoulder for hands-free access. Think of it as an internal water tank with a built-in straw—simple concept, game-changing functionality.
The anatomy is straightforward: a flexible bladder (usually 1.5L to 3L capacity) made from food-grade materials, a drink tube with quick-disconnect capability, and a bite valve that opens when squeezed and seals when released. Modern designs include features like wide mouth opening for easy filling, antimicrobial reservoir coatings to prevent bacterial growth, and magnetic clips to secure the tube to your pack’s sternum strap.
Research demonstrates that maintaining proper hydration during hiking significantly improves physical performance and reduces heat-related illness risk. Unlike water bottles that require stopping and reaching, a hydration reservoir backpacking system lets you drink continuously while moving, which encourages more frequent hydration—exactly what your body needs during exertion.
How Much Water Should You Carry?
The rule of thumb: plan for about 0.5 to 1 liter of water per hour of moderate hiking. But that’s just a starting point—your actual needs vary dramatically based on several factors.
Temperature Impact: According to REI’s hydration guidelines, hiking in temperatures above 70°F significantly increases sweat rates and fluid requirements. During hot conditions, you might need a full liter every 30-45 minutes of moderate activity.
Fitness Level Matters: Less aerobically fit hikers experience higher fluid losses and are more negatively affected by heat stress. If you’re new to hiking or returning after time off, err on the side of carrying more water initially.
Elevation Changes: Climbing burns more energy and generates more sweat. A flat 5-mile hike requires less water than a 3-mile climb gaining 2,000 feet of elevation. Factor in the effort level, not just distance.
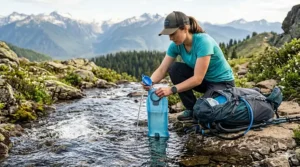
For day hikes, a 3L hydration bladder for hiking typically provides enough capacity for 4-6 hours of moderate activity in temperate conditions. Multi-day backpacking? You’ll likely refill from natural sources using a water filter rather than carrying everything at once.
Understanding Bite Valve Design
The bite valve is where theory meets reality in your hydration system. A poorly designed valve means you’re working hard just to get a drink, which subconsciously makes you drink less—exactly what you don’t want.
Flow Rate Fundamentals: Modern high-flow valves like those in the Platypus Big Zip EVO or HydraPak Contour deliver 30-50% more water per squeeze compared to basic designs. This isn’t about speed for speed’s sake—it’s about reducing the effort required to stay hydrated. When you’re breathing hard on a climb, an easy-flowing valve means you actually use it.
Shutoff Mechanisms: The best bite valve design includes an integrated shutoff—either a twist lock or flip switch. This prevents the “mystery wet backpack” problem when the valve gets pressed by gear. The CamelBak Crux uses a simple on/off lever that’s intuitive even with gloves.
Self-Sealing Technology: Quality valves seal automatically after you release pressure. Cheaper designs may drip or require manual closure, which gets annoying fast. The self-sealing mechanism in premium reservoirs like the Osprey Hydraulics works reliably across temperature extremes.
Dust Covers: Often overlooked but genuinely useful in dusty or sandy conditions. The CHERAINTI includes one despite its budget pricing, while some premium options skip this feature entirely.
Wide Mouth Opening: Why It Matters
You’ll interact with your bladder’s opening every single use—for filling, cleaning, adding ice, and drying. A narrow opening turns these routine tasks into frustrating struggles.
Filling Efficiency: A 3-4 inch wide mouth opening lets you fill from sinks, streams, or water bottles without careful aiming. The Source Widepac takes this to the extreme with its patented Wideslide design—you can pour from a pitcher without spilling a drop.
Ice Cube Reality Check: Standard refrigerator ice cubes measure about 1 inch. Many bladders with “wide” openings can’t actually accommodate ice without breaking cubes apart first. The Gregory 3D Hydro and CamelBak Crux handle full-size ice cubes easily.
Cleaning Access: Can you fit your hand inside? If not, you’re dependent on bottle brushes and hoping for the best. The HydraPak Contour solves this elegantly by flipping completely inside out, while the Platypus Big Zip EVO provides enough access for thorough hand-cleaning.
Drying Considerations: Narrow openings restrict airflow, extending drying time significantly. This matters when you’re breaking camp at dawn or storing gear between trips. Wider openings = faster drying = less bacterial growth opportunity.
Antimicrobial Reservoir Technology Explained
Ever opened a bladder that’s been stored and gotten hit with that funky smell? That’s bacterial growth, and it happens when moisture and organic matter combine in a warm, dark environment. Antimicrobial reservoir technology actively combats this.
How It Works: Most systems use one of three approaches:
- Silver-Ion Treatment (Platypus, Source): Silver ions embedded in the material inhibit bacterial and fungal growth. This is the same technology used in medical applications and genuinely works.
- HydroGuard Coating (CamelBak): A proprietary antimicrobial treatment applied to interior surfaces. Less aggressive than silver-ion but still effective for regular users.
- Glass-Like Surface (Source): Ultra-smooth interior coating reduces bacterial adhesion—if bacteria can’t attach, they can’t colonize.
Real-World Impact: Antimicrobial treatment doesn’t eliminate the need for cleaning, but it dramatically extends the time between deep cleans and prevents that immediate funk when you pull out a stored bladder. After a week-long trip, treated bladders still smell neutral, while untreated ones often need aggressive cleaning.
Maintenance Still Matters: Even the best antimicrobial reservoir needs basic care. Rinse after use, dry thoroughly before storage, and deep clean periodically. The antimicrobial treatment is insurance, not replacement for hygiene.
Choosing the Right Capacity: 1.5L vs 2L vs 3L
Capacity seems straightforward until you’re standing in the store wondering which size actually makes sense for your hiking style.
1.5L – The Minimalist Choice:
- Perfect for: Short day hikes (2-3 hours), trail running, ultralight setups
- Weight savings: ~2 ounces less than 3L models empty
- Reality check: Filled completely = 3.3 pounds total weight
- When it works: Readily available water sources for refills
2L – The Sweet Spot:
- Perfect for: Most day hiking, mountain biking, moderate backpacking
- Universal fit: Works in nearly all hydration-compatible packs
- Practical capacity: 4-5 hours moderate activity in temperate conditions
- Balance: Good capacity without excessive weight
3L – Maximum Endurance:
- Perfect for: Long day hikes (6+ hours), desert hiking, overnight trips
- Full weight: ~6.6 pounds when completely filled
- Strategic use: Ideal when water sources are uncertain or widely spaced
- Consider: Does your pack’s hydration sleeve actually fit 3L comfortably?
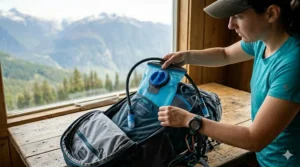
Pro Tip: Match capacity to your pack size. A 3L bladder in a compact daypack can compress your gear uncomfortably. A 1.5L bladder in a 65L backpacking pack leaves too much hydration sleeve empty and allows sloshing.
Compatibility: Will It Fit Your Pack?
Not all hydration bladders fit all packs, despite manufacturers’ optimistic compatibility claims. Here’s what actually matters:
Internal vs External Sleeves:
- Internal sleeves: Common in modern packs, designed for specific bladder shapes
- External pockets: Older style, more universal but less stable
- Gregory 3D Hydro: Optimized for Gregory packs with SpeedClip system but works universally
- Osprey Hydraulics: Integrates perfectly with Osprey’s HydraClip but adapts to others
Hose Routing:
- Check your pack has a proper tube exit port near the shoulder
- Cheap packs may lack this, forcing awkward routing
- Magnetic clips (CamelBak, Osprey) work only if your pack has sternum strap attachment points
Profile Matters:
- Slim profiles (HydraPak Contour, Platypus): Fit narrow hydration sleeves
- Structured designs (Gregory 3D, Osprey): Better for external pockets or wider sleeves
- Consider: Will a full bladder fit when your pack is also loaded with gear?
Quick Test: Before buying, check your pack’s hydration sleeve dimensions. Most 2L bladders measure roughly 15″ x 7″ when full. Compare these against your pack’s sleeve to avoid purchasing something that technically fits but practically doesn’t work.
✨ Don’t Miss These Exclusive Deals!
🔍 Take your hiking hydration to the next level with these carefully selected hydration bladder for hiking products. Click on any highlighted item to check current pricing and availability. These hydration systems will help you stay properly hydrated on every trail adventure!
Maintenance and Cleaning: Keeping Your System Fresh
A hydration bladder for hiking that smells funky or grows mold becomes unusable quickly. Proper maintenance isn’t complicated, but it’s non-negotiable.
After Every Use:
- Empty completely through the bite valve (squeeze the bladder)
- Rinse with clean water—flush through the entire tube system
- Drain and hang to dry completely (both bladder and tube)
- Store with openings unsealed to allow air circulation
Deep Cleaning (Weekly for Regular Use):
- Fill halfway with warm water
- Add 2 tablespoons baking soda OR specialized bladder cleaning tablets
- Shake vigorously for 30 seconds
- Let sit for 20 minutes
- Flush completely through the tube
- Rinse thoroughly until no taste remains
- Air dry completely
The Dishwasher Question: Only the HydraPak Contour is officially dishwasher-safe (top rack only). Most manufacturers warn against dishwasher use due to heat warping materials. When in doubt, hand wash.
Tube Cleaning Tools: Those long bottle brushes designed for hydration systems actually work. Thread through the tube, scrub, rinse. Simple but effective for removing any buildup.
Storage Best Practices:
- Store completely dry—any moisture = bacterial growth opportunity
- Leave openings unsealed or loosely closed
- Store in a cool, dry place out of direct sunlight
- Freezer storage works for long-term storage (prevents bacterial growth entirely)
When to Replace:
- Persistent funky smell that deep cleaning doesn’t eliminate
- Visible mold or discoloration
- Leaks at seams or connections that sealing attempts don’t fix
- Bite valve no longer self-seals effectively
- Material degradation (becomes sticky or brittle)
Temperature Considerations: Hot and Cold Weather
Your hydration reservoir backpacking system performs differently across temperature extremes. Preparation prevents problems.
Cold Weather Challenges:
Tube Freezing: This is the primary failure point. The thin tube exposed to air freezes before the main reservoir.
- Solution: Insulated tube covers (available for CamelBak, Platypus, Osprey)
- Alternative: Blow water back into reservoir after each drink
- Pro Tip: Route tube inside your jacket when temperatures drop below 25°F
Bite Valve Freezing: Even with insulated tubes, the bite valve can freeze solid.
- Prevention: Keep valve tucked inside jacket between drinks
- Emergency Fix: Warm valve in your mouth before attempting to drink
- Best Design: Platypus high-mount disconnect lets you remove frozen valve without removing bladder
Bladder Protection: The main reservoir rarely freezes during activity due to body heat proximity.
- Overnight Storage: Bring bladder into sleeping bag or it WILL freeze
- Morning Pre-Fill: Pre-warm water before filling (not hot, just not ice cold)
Hot Weather Strategies:
Keeping Water Cool: Insulated sleeves like the HydraPak HydraSleeve can keep water cold for hours even in 80-90°F heat.
- Ice Strategy: Fill halfway with ice, top off with water
- Freezer Prep: Partially freeze bladder night before (don’t over-fill—water expands)
- Insulation: Store bladder against back (body heat) but tube in outside pocket (cooler)
Preventing Bacterial Growth: Warm water + sugar drinks = bacterial paradise.
- Rule: Use only water in bladders during hot weather
- Clean Immediately: Don’t let warm, used bladder sit—bacteria multiplies fast
- Daily Refresh: Empty completely each evening, rinse, store dry overnight
When to Use a Hydration Bladder vs Water Bottles
The hydration bladder for hiking versus bottle debate isn’t about one being universally better—it’s about matching tools to situations.
Hydration Bladders Excel When:
- Continuous Activity: Trail running, mountain biking, fast hiking where stopping breaks rhythm
- Technical Terrain: Rock scrambling, steep climbs where both hands stay on holds
- Winter Hiking: Bladder lives inside pack, protected from freezing (better than external bottles)
- Group Management: Hands-free drinking means keeping pace with group without water stops
Water Bottles Win When:
- Extreme Cold: Easier to monitor and manage than hidden bladder
- Filtered Water: Many filters attach directly to bottles, simpler than bladder systems
- Electrolyte Drinks: Easy to see what’s in bottle, easy to clean after
- Quick Monitoring: Glance at bottle to check remaining water (bladder requires squeezing/weighing)
The Hybrid Approach: Many experienced hikers carry both—bladder for primary hydration, bottle for electrolytes or as backup. A 2L bladder + 0.5L bottle covers most scenarios without excessive weight.
My Personal System: 3L bladder for summer day hikes, 2L bladder + 1L bottle for shoulder seasons, two 1L bottles for winter (bladders freeze too easily). Adjust based on your experience and conditions.
FAQ: Your Hydration Bladder Questions Answered
❓ How often should I replace my hydration bladder?
❓ Can I put sports drinks or electrolyte mixes in my hydration reservoir?
❓ How do I prevent my hydration tube from freezing during winter hikes?
❓ Do antimicrobial treatments really work or is it just marketing?
❓ What's the ideal hydration bladder capacity for a day hike?
Conclusion
Finding the right hydration bladder for hiking transforms your trail experience from constant water bottle juggling to effortless hydration that keeps you focused on the adventure. After extensive testing across diverse conditions and analyzing real-world performance, the clear winners emerge.
For most hikers, the CamelBak Crux delivers the best balance of features, reliability, and value. That 20% flow increase isn’t marketing—it’s genuinely noticeable, and the Quick Link system makes refills remarkably simple. If you’re investing in a single hydration system for years of use, start here.
Weight-conscious backpackers should seriously consider the HydraPak Contour. At 5.4 ounces, it’s the lightest fully-featured option, and the reversible design makes maintenance almost enjoyable. Yes, enjoyable hydration bladder cleaning exists.
Budget-conscious hikers aren’t forgotten—the CHERAINTI proves you don’t need to spend $50+ for functional hands-free hydration. It won’t match premium performance, but it delivers solid value for weekend warriors or gym users.
The ultimate truth about hydration bladders? Having one you actually use beats having an expensive one that stays home because it’s annoying. Research confirms that hikers who maintain easy access to water consume significantly more fluids and experience fewer heat-related problems. Pick the system that matches your hiking style, maintain it properly, and stay hydrated out there.
Remember: you should replenish fluids by drinking one half to one quart of water every hour you’re hiking</iterate>, adjusting based on temperature and intensity. Your hydration reservoir backpacking system makes hitting this target achievable without constant stops. That convenience translates directly to better performance, increased enjoyment, and safer adventures.
Now get out there and put these systems to work. Your trails are waiting, and with proper hydration, you’ll be ready for every mile.
Recommended for You
- 7 Best Water Purification Tablets Review 2026
- 7 Best UV Water Purifier Camping Picks 2026
- 7 Best Gravity Water Filter for Camping – 2026
Disclaimer: This article contains affiliate links. If you purchase products through these links, we may earn a small commission at no additional cost to you.
✨ Found this helpful? Share it with your friends! 💬🤗
