In This Article
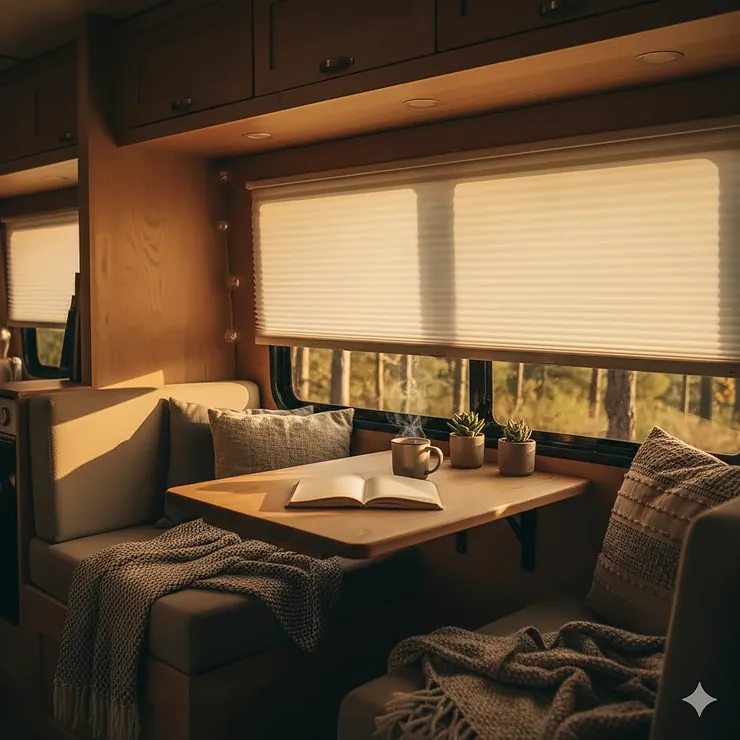
Ever wake up at sunrise in your camper when you planned to sleep until noon? Or felt like you’re living in a greenhouse on wheels during summer trips? You’re not alone. Finding the right blinds for camper windows isn’t just about blocking light—it’s about controlling temperature, protecting your privacy, and preserving your RV’s interior from damaging UV rays.
After spending countless weekends testing different blinds for camper setups and talking to fellow RV enthusiasts, I’ve discovered what truly makes a difference on the road. The right window treatments can drop your interior temperature by 10-15 degrees, reduce your AC usage significantly, and prevent that awkward morning when strangers peer into your mobile home while you’re having coffee in your pajamas. Whether you’re a weekend warrior or a full-time RVer, choosing quality blinds for camper windows is one of the smartest upgrades you’ll make. Let me share what I’ve learned about selecting blinds that actually work for RV life.
Quick Comparison Table: Best Blinds for Camper
| Product | Size Options | UV Protection | Blackout Level | Price Range | Best For |
|---|---|---|---|---|---|
| RVINGPRO RV Blinds | 10+ sizes | Anti-UV polyester | 75% | $15-$45 | Budget-conscious RVers |
| Dulepax RV Pleated Shades | 18 sizes, 2 colors | High UV blocking | 75% | $18-$50 | Variety seekers |
| RecPro Cotton Shades | 15+ sizes | Premium UV block | Opaque | $25-$65 | Quality enthusiasts |
| LUCKUP Blackout Blinds | 5 sizes, 2 colors | Aluminum foil backing | 100% | $30-$55 | Complete darkness |
| SHADEPLUS RV Blinds | 12+ sizes | UV resistant | 70% | $20-$48 | Mid-range buyers |
| Eazy2hD Day & Night | 5 sizes | Dual-layer | Adjustable | $35-$60 | Flexibility lovers |
| Generic RV Shades | 8 sizes | Standard UV | 65% | $22-$52 | Value shoppers |
💬 Just one click – help others make better buying decisions too! 😊
Top 7 Blinds for Camper: Expert Analysis 🏆
1. RVINGPRO RV Blinds for Camper Windows
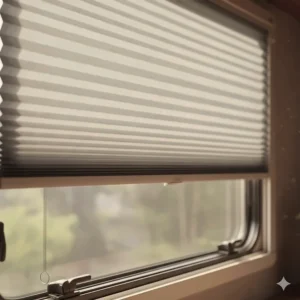
If you’re searching for reliable blinds for camper that won’t break the bank, RVINGPRO RV Blinds deserve serious consideration. These pleated shades come in three versatile colors (black, cappuccino, and grey) with sizes ranging from small door windows to panoramic views.
The anti-UV polyester material does double duty—protecting your skin from harmful rays while keeping your RV interior from fading. Installation is genuinely simple, taking about 10 minutes with the included mounting hardware. One clever touch: they provide extra screws and brackets, acknowledging that things get lost during RV adventures.
Key Specs: 32″ W x 24″ L (most popular size), durable polyester, easy-clean surface
Price: $18-$25 depending on size
Customer Feedback: Users love how these blinds for camper transform morning light issues, though some mention the pull cords could be sturdier.
✅ Multiple color and size options
✅ Extra mounting hardware included
✅ Easy to clean with wet towel
❌ Pull cord durability concerns
❌ Not 100% blackout
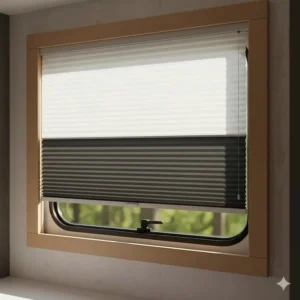
2. Dulepax RV Blinds Pleated Shades
For RVers who value options, Dulepax RV Blinds offer an impressive 18 sizes in two sophisticated colors. These blinds for camper excel at the sweet spot between privacy and light control, blocking approximately 75% of light while maintaining that pleated aesthetic that elevates your RV’s interior look.
The artistic pleated workmanship stands out compared to cheaper alternatives. They’re specifically designed with RV life in mind—the width should be about 3 inches wider than your window for optimal privacy protection. The quick installation process includes clear instructions, though first-timers might need 15-20 minutes for their initial install.
Key Specs: Available in 18 different sizes, cappuccino and black colors, 75% light blocking
Price: $18-$50 across size range
Customer Feedback: Reviewers appreciate the extensive size selection and elegant appearance, with some noting these blinds for camper perfectly match their RV’s aesthetic.
✅ 18 size options cover virtually all RV windows
✅ Highly artistic pleated design
✅ 7×24 customer support
❌ Not total blackout (75% light blocking)
❌ Installation instructions could be clearer
3. RecPro RV Blinds Pleated Shades
When it comes to premium blinds for camper, RecPro RV Blinds have built a reputation among serious RVers. Made from quality cotton fabric, these shades feel more substantial than typical polyester options. They’re lightweight enough to avoid dust buildup but thick enough to provide genuine privacy—completely opaque, perfect for those who value nighttime privacy or afternoon naps.
According to the Skin Cancer Foundation, window treatments that block UV rays are essential for preventing skin damage during extended travel. RecPro’s cotton material blocks these harmful rays effectively while keeping your RV interior cooler. The brand offers over 15 size combinations, ensuring you’ll find the perfect fit for your specific RV model.
Key Specs: Cotton fabric construction, complete opacity, available in 15+ sizes
Price: $25-$65 depending on dimensions
Customer Feedback: Long-term users report these blinds for camper last multiple seasons without fading, though some received incomplete hardware.
✅ Premium cotton material
✅ Complete privacy (opaque fabric)
✅ Excellent UV protection
❌ Higher price point
❌ Occasional missing hardware reports
4. LUCKUP RV Blinds Blackout with Aluminum Foil
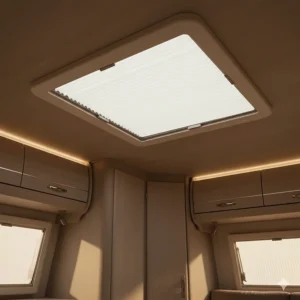
For those who demand absolute darkness, LUCKUP RV Blinds bring serious technology to blinds for camper. The game-changer is the silver aluminum foil backing that delivers 100% blackout performance. If you’re a light sleeper, work night shifts, or simply want complete control over your RV’s lighting, these are worth every penny.
The double-layered thickened fabric doesn’t just block light—it also reduces heat gain significantly. Summer camping becomes more comfortable as these blinds for camper reflect heat away from windows. The bottom rod system makes height adjustment effortless; simply hold the center and lift or lower to your desired position.
Key Specs: Available in 5 sizes, 2 colors (black/cappuccino), aluminum foil backing, 100% blackout
Price: $30-$55 depending on size
Customer Feedback: Night shift workers and families with young children praise these blinds for camper as life-changing for sleep quality.
✅ 100% complete blackout
✅ Aluminum foil reduces heat gain
✅ Easy height adjustment system
❌ Higher price than standard options
❌ Aluminum backing adds slight weight
5. SHADEPLUS RV Blinds Pleated Window Shades
SHADEPLUS RV Blinds represent solid middle-ground blinds for camper—not the cheapest, not the most expensive, but reliably effective. These pleated shades deliver approximately 70% light blocking, making them ideal for those who want privacy without complete darkness. The thick pleated fabric construction feels durable enough to handle the bumps and vibrations of RV travel.
Installation follows the standard 10-minute timeline once you understand the process. The included mounting hardware covers everything needed, though measuring accurately before ordering is crucial (a common theme with all blinds for camper). The cappuccino color option adds warmth to RV interiors without feeling too dark.
Key Specs: 12+ size options, 70% light blocking, thick pleated fabric
Price: $20-$48 across sizes
Customer Feedback: Users describe these blinds for camper as “exactly what we expected”—solid performers without surprises.
✅ Balanced light control (70%)
✅ Durable thick fabric
✅ Reliable mid-range option
❌ No standout features
❌ Limited color choices
6. Eazy2hD 2 Pack RV Pleated Blinds Day & Night
The innovative Eazy2hD Day & Night Blinds solve a common blinds for camper dilemma: wanting both privacy and natural light at different times. The dual-layer design lets you adjust between complete privacy, filtered light, or open views without removing or replacing anything. This versatility proves invaluable during extended RV trips where your needs change throughout the day.
The dimmable functionality makes these blinds for camper perfect for movie watching or creating ambiance in the evening. The two-pack pricing also sweetens the deal if you need to outfit multiple windows. Internal roller shade construction means no external hardware cluttering your RV’s exterior appearance.
Key Specs: 32″ W x 24″ L, dual-layer design, dimmable comfort, 2-pack included
Price: $35-$60 for two blinds
Customer Feedback: RVers love the flexibility, particularly families who want different light levels throughout the day.
✅ Day and night functionality
✅ Two blinds included
✅ No exterior hardware needed
❌ Limited size availability
❌ More complex operation than standard blinds
7. Generic RV Window Shade Pleated Shades
Sometimes you need functional blinds for camper without overthinking it. Generic RV Window Shades deliver exactly that—straightforward pleated shades that block about 65% of light, provide decent UV protection, and install quickly. While they lack premium features, they excel at the basics for budget-conscious RVers.
These blinds for camper work particularly well for spare windows or less-critical areas where you don’t need maximum performance. The 50″ W x 24″ L option fits many RV front windows, while smaller sizes handle side windows effectively. Expect standard durability—they’ll last a few seasons with normal use.
Key Specs: 8 size options, 65% light blocking, standard installation
Price: $22-$52 depending on size
Customer Feedback: Reviews center on “good enough for the price”—exactly what value shoppers want to hear.
✅ Budget-friendly pricing
✅ Adequate light blocking for most needs
✅ Simple, straightforward installation
❌ Lower light blocking than premium options
❌ Basic construction materials
Understanding UV Protection in RV Window Treatments
When you’re researching blinds for camper, UV protection often gets mentioned but rarely explained. Here’s why it matters more than you might think. UV radiation passes through standard RV windows just like it does in your home, potentially causing skin damage during long trips and definitely causing interior fading and deterioration.
Quality blinds for camper block 75-99% of UV rays depending on material and construction. This protection extends the life of your RV’s upholstery, prevents dashboard cracking, and protects your family’s skin during extended travel days. The investment in UV-blocking blinds for camper often pays for itself by preventing costly interior repairs down the road.
Look for blinds specifically mentioning UV protection in their specifications. Materials like polyester with UV-resistant coatings, aluminum-backed fabrics, and thick cotton weaves perform best. If you spend significant time in sunny climates, prioritize blinds for camper with higher UV blocking percentages.
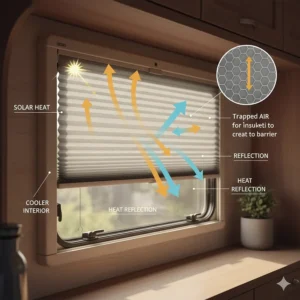
The Science of Temperature Control in Your RV
Temperature management represents one of the most practical reasons for upgrading your blinds for camper. According to RV window treatment experts, proper window coverings can reduce interior temperatures by 10-25 degrees Fahrenheit, dramatically decreasing AC usage and extending your battery life when boondocking.
The magic happens through multiple mechanisms. First, light-colored or reflective blinds for camper bounce solar radiation back outside before it enters your space. Second, cellular or pleated designs create air pockets that insulate against both heat and cold. Third, quality materials prevent heat transfer through the window itself.
For maximum temperature control, combine your blinds for camper with strategic window placement when parking. Face your windshield away from afternoon sun, close blinds on the sunny side during peak heat, and open them for cross-ventilation during cooler morning hours. This approach can reduce your cooling costs by 30-40% over a summer season.
Installation Made Easy: Step-by-Step Guide
Installing blinds for camper shouldn’t require engineering skills, and fortunately, most modern options make it genuinely simple. Here’s the process that works for nearly all pleated RV blinds:
Step 1: Accurate Measuring — Measure your window opening at the top, middle, and bottom. Use the smallest measurement. For inside mounting, subtract 1/4 inch for clearance. For outside mounting, add 2-3 inches to width.
Step 2: Unpack and Verify — Check that all mounting brackets, screws, and hardware arrived. Most manufacturers include extras, but confirm before starting.
Step 3: Mark Bracket Positions — Position brackets 2-4 inches from each window edge. Use a level to ensure they’re aligned. Mark screw holes with a pencil.
Step 4: Drill Pilot Holes — Use a drill bit slightly smaller than your screws. Pilot holes prevent splitting in RV walls and ensure straight installation.
Step 5: Mount Brackets — Screw brackets into place, starting with top brackets. Hand-tighten first, then use a screwdriver for final tightening—don’t overtighten in RV walls.
Step 6: Install Blinds — Snap or slide your blinds for camper into mounted brackets. Most use a simple clip system that requires no tools.
Step 7: Test Operation — Raise and lower blinds several times to ensure smooth operation. Adjust bracket position if needed.
The entire process typically takes 10-15 minutes per window once you’ve done your first one. Pro tip: install one completely before starting the next—this helps you refine your technique and ensures you’re happy with positioning before committing to multiple installations.
Choosing the Right Size: Measuring Your RV Windows
One of the most common mistakes with blinds for camper is ordering the wrong size. RV windows come in dozens of non-standard dimensions, and measuring incorrectly means frustrating returns and delays. Let me walk you through the foolproof measurement process.
Start by deciding between inside and outside mounting. Inside mounting sits within the window frame, providing a cleaner look but requiring precise measurements. Outside mounting attaches to the wall around the window, offering more flexibility and better light blocking. Most RVers prefer inside mounting for aesthetics, outside mounting for door windows where complete coverage matters.
For inside mounting, measure the window opening width at three points (top, middle, bottom) and use the smallest measurement. Measure height from top to bottom at three points (left, middle, right) and again use the smallest. Subtract 1/4 inch from both measurements for proper fit and operation. This clearance prevents binding.
For outside mounting, measure the actual window glass, then add 2-3 inches to width and 3-4 inches to height. This overlap ensures complete light blocking and privacy. Mark where you want the blinds for camper to sit before measuring—this helps avoid conflicts with window trim or adjacent surfaces.
Double-check measurements before ordering. Most blind manufacturers cannot accept returns on opened products for hygiene reasons. Take photos of your windows with a tape measure visible if ordering custom sizes—many companies can verify measurements from photos before production.
Material Matters: Polyester vs Cotton vs Aluminum-Backed
The material of your blinds for camper dramatically affects performance, durability, and price. Understanding these differences helps you choose wisely for your specific needs and budget.
Polyester dominates the budget and mid-range market. It’s lightweight, resists moisture, cleans easily, and handles RV travel vibrations well. UV-treated polyester lasts 3-5 years in regular use. The downsides? Lower-quality polyester feels cheap, may develop waves in hot weather, and offers moderate insulation at best. Best for: Occasional RVers and those replacing factory blinds.
Cotton or cotton-blend represents the premium choice for blinds for camper. Cotton provides superior insulation, blocks light more effectively, and offers that upscale aesthetic that makes your RV feel like home. It’s heavier (good for quality, bad for weight-conscious travelers) and requires more careful cleaning. Cotton blinds typically last 5-8 years with proper care. Best for: Full-timers and those wanting maximum comfort.
Aluminum-backed brings technology to window coverage. The metallic layer reflects heat and creates true blackout conditions. These blinds for camper excel in extreme heat or for light-sensitive sleepers. They’re heavier than polyester, may crinkle slightly over time, and cost more upfront. Lifespan averages 4-6 years. Best for: Desert camping, summer travelers, and anyone prioritizing temperature control.
Some newer options combine materials—polyester body with aluminum backing, for instance—offering multiple benefits. These hybrid blinds for camper represent excellent value for money when available.
Maintenance Tips for Long-Lasting Performance
Quality blinds for camper deserve proper care to maximize their lifespan. RV life subjects window treatments to dust, humidity, temperature extremes, and constant vibration—factors that don’t affect home blinds. Here’s how to keep yours performing well for years.
Regular Dusting (Weekly): Use a microfiber cloth or soft duster to remove dust before it accumulates. Dust acts like sandpaper against fabric during travel, gradually wearing blinds down. Make this part of your departure routine—clean blinds, check tire pressure, verify hitch connection.
Deep Cleaning (Monthly or After Dusty Trips): Vacuum blinds using the brush attachment on low suction. For polyester blinds for camper, a damp cloth with mild soap works wonders. Cotton blinds require more caution—spot clean only unless manufacturer specifies otherwise. Always let blinds dry completely before closing.
Inspect Hardware (Every 3 Months): Check that brackets remain tight, cords aren’t fraying, and operation stays smooth. Tighten loose screws before they fall out during travel. RV vibrations gradually loosen everything, and blinds are no exception.
Protect During Storage: When storing your RV for extended periods, leave blinds partially open to prevent creasing and allow air circulation. This prevents mildew in humid climates and maintains fabric shape. If your RV sits in direct sun, close blinds on the sunny side to protect interior furnishings.
Travel Position: Some experienced RVers recommend fully closing blinds for camper during travel to reduce wear from wind buffeting. Others prefer leaving them partially open to allow visibility and reduce fabric stress from being fully compressed. Test both approaches to see what works for your specific blinds and travel conditions.
Budget Breakdown: When to Splurge vs Save
Not every window in your RV deserves the same investment in blinds for camper. Strategic spending maximizes comfort while respecting your budget. Here’s how to allocate your window treatment dollars wisely.
Splurge on: Main living area windows where you spend most time. These face varying sun exposures throughout the day and directly impact comfort. Premium blinds here deliver daily benefits. Also invest in bedroom windows—quality sleep depends on effective light control. If you frequently dry camp, prioritize windows that receive afternoon sun, as temperature control directly affects battery life.
Go mid-range for: Kitchen and bathroom windows where functionality matters but you spend less continuous time. Decent UV protection and privacy suffice; you don’t need premium features. Side windows that receive indirect sunlight also fall into this category. Reliable performance matters more than extra features.
Save on: Windows in storage areas, small accent windows, and locations where you already have curtains or shades you like. Generic blinds for camper work perfectly fine here. Also consider saving on windows that face constantly shaded directions—north-facing windows in the northern hemisphere receive minimal direct sun year-round.
For a typical 30-foot travel trailer, expect to spend $200-400 for budget blinds across all windows, $400-700 for mid-range quality, or $700-1,200 for premium options throughout. Most RVers find success with a mixed approach: premium blinds for 3-4 key windows, mid-range for the rest. This strategy typically costs $350-550 and delivers 80% of the benefits of going fully premium.
✨ Don’t Miss These Exclusive Deals!
🔍 Take your RV comfort to the next level with these carefully selected blinds for camper. Click on any highlighted product to check current pricing and availability. These window treatments will help you create the perfect mobile sanctuary your family will love!
Privacy Solutions for Full-Time RVers
Privacy takes on new meaning when your home has wheels. Unlike houses with yards creating natural buffers, RVs often sit in campgrounds where neighbors walk past your windows constantly. Proper blinds for camper become essential for comfortable living, not just sun control.
The privacy challenge varies by camping style. Campground RVers face the closest quarters—your windows may be 10-15 feet from walkways where strangers pass regularly. Boondockers enjoy more distance but often park in exposed locations where anyone approaching sees directly into your space. Full-time RVers need reliable privacy daily, not just occasionally.
Opaque blinds for camper provide maximum privacy but block all views and light. This works well for bedrooms and bathrooms but feels isolating in living areas. Light-filtering options offer a better compromise for main spaces—people outside see shapes and movement but no details, while you maintain connection to your surroundings. Some RVers use opaque blinds in bedrooms, light-filtering in living areas, and leave kitchen windows fully open during daytime.
Consider window film as a companion to blinds for camper. One-way privacy film allows you to see out while preventing others from seeing in during daylight. It doesn’t help at night when interior lights are on, so you’ll still need blinds, but it adds a layer of daytime privacy while maintaining views. Film also adds UV protection and slightly improves insulation.
Location matters more than you might think. An RV with living area windows facing the picnic table and fire pit needs more privacy than one where those windows face away from common areas. Evaluate your typical parking arrangements before deciding how much to invest in privacy features.
Comparing Day-Night Shades vs Traditional Blinds
Day-night shades (also called dual-layer or zebra blinds) offer an intriguing alternative to traditional blinds for camper. These innovative window treatments feature alternating transparent and opaque horizontal bands that adjust to provide varying light control without fully opening or closing the blind. Are they worth the extra cost for RV use?
The primary advantage is flexibility. With day-night shades, you can achieve filtered light for daytime privacy while maintaining views, then shift to align opaque bands for complete privacy and light blocking at night—all without raising or lowering the blind. This versatility suits RV life where your lighting and privacy needs fluctuate throughout the day.
Installation and operation resemble traditional blinds for camper but typically require slightly more precision during setup. The dual-layer mechanism means more moving parts that could potentially fail, though quality brands design for durability. Weight runs slightly higher than single-layer options—usually not enough to matter but worth considering if you’re already at payload limits.
The visual appearance divides opinions. Some RVers love the modern, sophisticated look of day-night shades. Others find the stripe pattern busy or prefer the clean lines of traditional pleated blinds. The horizontal bands also show dust more visibly than smooth pleated fabric, requiring more frequent cleaning to maintain appearance.
Cost typically runs 30-50% higher than comparable traditional blinds for camper. For main living area windows where you’ll use the flexibility daily, this investment makes sense. For bedrooms where you mostly want darkness, standard blackout blinds deliver better value. Most RVers find success mixing types: day-night shades for living areas, traditional blinds elsewhere.
Seasonal Considerations: Winter vs Summer Performance
Your blinds for camper face different challenges depending on season and climate. Understanding these variations helps you choose options that perform well year-round or adjust your approach seasonally.
Summer: Heat control dominates concerns. Blinds that reflect solar radiation prevent your RV from becoming an oven. Light colors work better than dark—white or silver blinds for camper can reduce interior temperatures by 15-20 degrees compared to dark colors. Aluminum-backed options excel here, reflecting heat before it enters your space. Also consider cellular or honeycomb designs that trap air and improve insulation. Close blinds before interior temperatures rise; once your RV heats up, blinds can’t cool it down—they only prevent further heating.
Winter: Insulation becomes priority. The same air-trapping designs that help in summer now prevent heat loss. Double-layer blinds for camper provide superior winter performance compared to single-layer options. Dark colors absorb what little winter sun reaches you, potentially adding 2-3 degrees of passive heating on sunny days. Leave blinds open on south-facing windows during daylight, close them at night to retain heat. Many full-timers add thermal curtains over their blinds during winter for extra insulation, particularly in northern climates.
Shoulder Seasons (Spring/Fall): These require the most adjustment. Morning may need heat retention while afternoon demands heat rejection. This is where adjustable blinds for camper shine. Options that allow partial opening or day-night styles give you control hour by hour as conditions change.
If you RV year-round in varied climates, invest in versatile blinds for camper that handle both extremes. If you’re strictly summer campers, prioritize heat rejection over insulation. Winter-only RVers should focus on maximum insulation value. Understanding your usage pattern prevents paying for features you won’t need.
Troubleshooting Common Blind Problems in RVs
Even quality blinds for camper develop issues over time. RV life subjects window treatments to unique stresses that home blinds never experience. Here’s how to address the most common problems before they require replacement.
Problem: Blinds won’t stay in position, constantly drifting up or down
Cause: Cord tension has loosened, or internal spring mechanism has weakened
Fix: Most pleated blinds for camper use a simple cord-lock system. Disassemble the headrail (usually just clips), increase cord tension by shortening it slightly, and reassemble. If spring-operated, replacement mechanisms cost $5-15 and take 20 minutes to install. Prevent this by avoiding excessive force when adjusting blinds.
Problem: Fabric develops waves or won’t lay flat
Cause: Heat exposure has relaxed the fabric, or moisture has caused swelling
Fix: For heat-related waves, try leaving blinds fully extended in a cool location for 24-48 hours—sometimes fabric self-corrects. For persistent issues, use a fabric steamer (not iron) on low setting, working from top to bottom. Prevention involves closing blinds when parked in direct sun and ensuring RV interior doesn’t exceed 85-90°F.
Problem: Brackets pulling away from wall
Cause: RV vibration loosens screws, or original installation didn’t use pilot holes
Fix: Remove blinds, examine holes. If stripped, move bracket 1-2 inches or use slightly larger screws with wall anchors designed for thin RV walls. Consider adding a small dab of removable thread-locker to screws to prevent future loosening while still allowing removal if needed.
Problem: Cords fraying or breaking
Cause: UV exposure and repeated use wear cord material
Fix: Replacement cord kits cost $3-8 and take 30 minutes to install. Most blinds for camper use standard cord that’s available at hardware stores. Prevent by keeping blinds closed when parked long-term to minimize UV exposure to cord material. Some RVers upgrade to more durable marine-grade cord proactively.
❓ FAQ: Your Blinds for Camper Questions Answered
❓ How long do blinds for camper typically last?
❓ Can I use regular home blinds in my camper?
❓ What's the best color for blinds in a camper?
❓ Are cordless blinds better for RVs than corded?
❓ Can I install blinds for camper myself?
Conclusion: Finding Your Perfect Camper Window Solution
After exploring everything about blinds for camper—from UV protection science to installation tips—you’re equipped to make an informed choice for your RV. The perfect blinds depend on your specific situation: budget, camping style, climate, and personal preferences all play roles in determining your ideal solution.
Remember that blinds for camper represent an investment in comfort, not just aesthetics. Quality window treatments pay dividends through reduced energy costs, protected interiors, better sleep, and enhanced privacy. If you’re uncertain where to start, the mid-range options from Dulepax or RecPro provide excellent all-around performance for most RVers. Light sleepers and hot weather campers should seriously consider the blackout technology in LUCKUP blinds. Budget-conscious weekend warriors will find RVINGPRO delivers solid basics without unnecessary features.
Don’t forget to measure carefully, order sizes suited to your mounting preference, and take time during installation for proper alignment. Your windows frame your mobile home’s connection to the outdoors—treating them right with quality blinds for camper transforms your entire RV experience. Safe travels, and may your windows always show you exactly what you want to see!
Recommended for You
- 15 Best Make Ahead Camping Meals for 2025 | Easy Pre-Made Options
- 7 Best Camper Water Tanks 2025 | Expert Reviews & Buying Guide
- 7 Best Camper Trailer Kitchen Sinks You Need in 2025
Disclaimer: This article contains affiliate links. If you purchase products through these links, we may earn a small commission at no additional cost to you.
✨ Found this helpful? Share it with your friends! 💬🤗